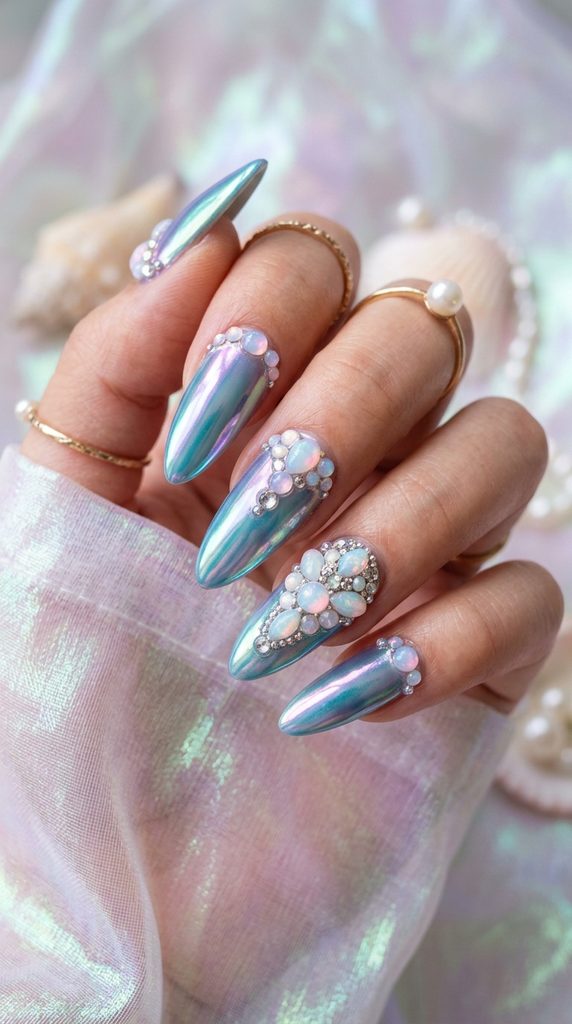
Bedazzled nails represent the ultimate fusion of luxury, self-expression, and technical nail artistry. Incorporating multi-faceted crystals, metallic studs, pearls, and intricate 3D charms transforms a standard manicure into a dazzling accessory that catches light with every gesture. Whether you prefer a subtle accent sparkle or an opulent, full-coverage crystal set, mastering the placement, application, and sealing techniques ensures your bedazzled manicures remain striking, durable, and snag-free.
Creating long-lasting gem-encrusted nail art requires understanding adhesive choices, gem sizes, top-coat isolation, and balancing visual placement. Equipping your nail setup with high-shine glass rhinestones, precision gel resins, and curing technology keeps every embellishment secure through daily routines without losing brilliant brilliance.
Here is a comprehensive guide to 10 bedazzled nail ideas, complete with technical nail prep, gem application workflows, and maintenance guidelines.
Technical Fundamentals, Adhesive Mechanics & Curing Standards
Before applying crystals or 3D charms to natural nails or extensions, establishing a solid prep foundation and using specialized curing adhesives guarantees maximum longevity without premature popping or snagging.
1. Adhesive Selection & Curing Mechanics
- High-Viscosity Gem Gel / Builder Resin: Traditional nail glue cures rapidly upon contact with air, but it can turn cloudy over glass rhinestones. Thick UV/LED gem glue or hard builder gel allows unlimited working time to adjust crystal placement before curing under a $36\text{W} – 48\text{W}$ LED lamp for 60 seconds.
- Perimeter Sealing Technique: Never apply a top coat directly over the top facets of glass crystals, as gel coating rounds off cut edges and dulls maximum sparkle. Instead, use a thin detail liner brush to trace non-wipe top coat strictly around the base perimeter of each gem to lock edges in place.
2. Rhinestone Sizing & Anatomic Placement
- Sizing Chart ($SS$ Scale):
- $SS3 – SS6\text{ (}1.3\text{mm} – 2.0\text{mm}\text{)}:$ Perfect for delicate cuticle framing, micro-clusters, and filling tiny gaps between larger stones.
- $SS8 – SS12\text{ (}2.4\text{mm} – 3.2\text{mm}\text{)}:$ Ideal for central nail accents, linear striping, and French tip outlines.
- $SS16 – SS20\text{ (}3.8\text{mm} – 4.8\text{mm}\text{)}:$ Statement focal stones for accent nails or centerpiece arrangements.
- Natural Nail Stress Area: Place larger gems or heavy 3D charms away from the free edge or extreme sides. Securing heavy charms closer to the apex or lower middle third of the nail bed prevents balance issues and accidental lifting.

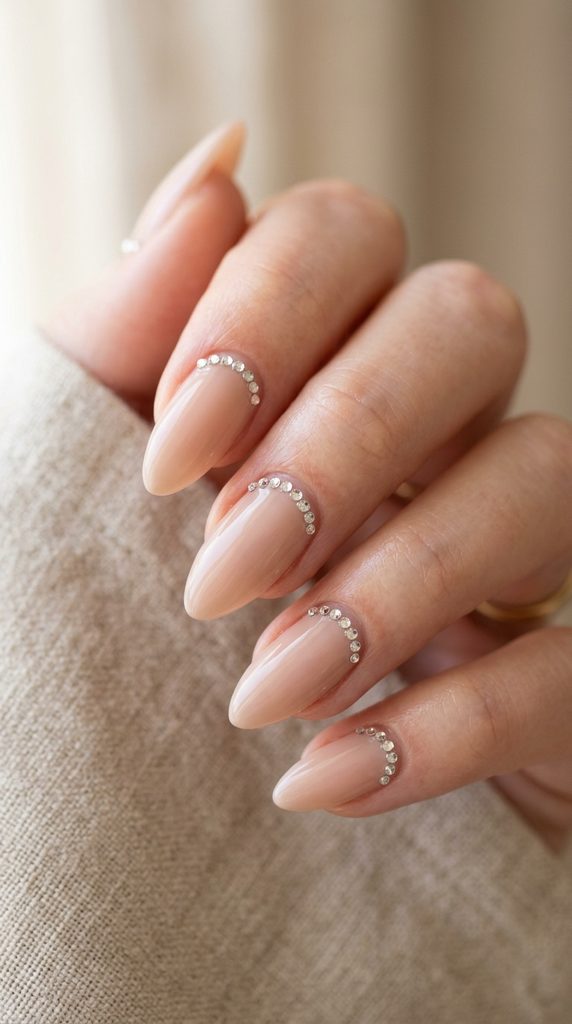
1. Nude Base with Cuticle Crown Rhinestones
Enhance a clean, natural nude or soft pink gel manicure by framing the lunula (cuticle crescent) with a delicate arch of sparkling micro-crystals.
Technical Specs & Application Workflow
- Base Polish: Semi-translucent nude, sheer blush pink, or milk bath gel color.
- Gems Required: $SS3\text{ and }SS5$ clear or Aurora Borealis (AB) flatback glass rhinestones.
- Placement Workflow: Apply a thin line of gem resin along the curved cuticle line. Place a central $SS5$ stone at the midpoint, then flank it on both sides with descending $SS3$ stones following the natural nail curve. Flash cure immediately to freeze placement.
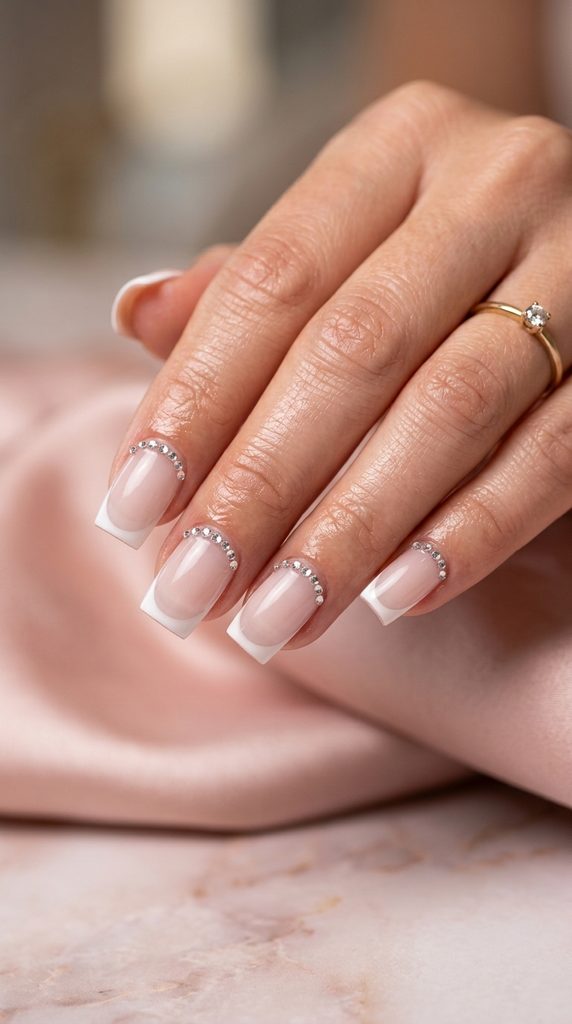
2. French Tip Accent with Crystal Contour Lines
Give the iconic white or pastel French manicure a high-glamour upgrade by tracing the precise smile line with a crisp row of sparkling flatbacks.
Technical Specs & Application Workflow
- Base Polish: Sheer pink base coat paired with crisp white, deep burgundy, or pastel French tips.
- Gems Required: $SS4\text{ to }SS6$ clear precision-cut glass rhinestones.
- Placement Best Practices: Paint and cure your French smile line first. Using a fine detail brush, paint a narrow line of non-wipe gem resin directly along the border where the tip color meets the sheer base. Nest small stones tightly along the contour for a seamless sparkling ribbon.
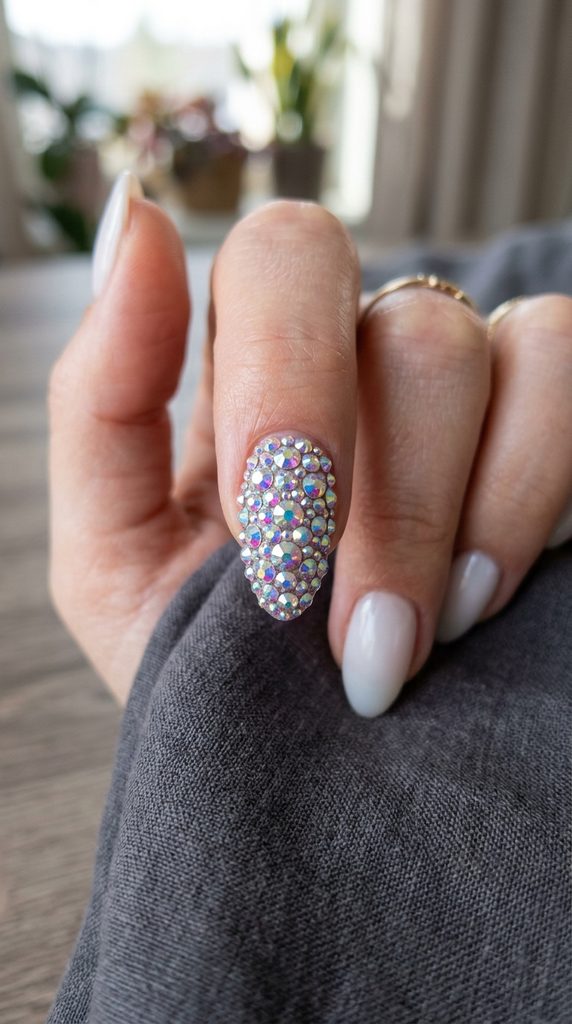
3. Full-Coverage Aurora Borealis (AB) Statement Nail
Create an eye-catching focal point on an accent nail (usually the ring finger) completely covered in a dense, gapless pavement of multi-faceted Aurora Borealis stones.
Technical Specs & Application Workflow
- Base Polish: Silver chrome, iridescent shimmer, or nude gel polish.
- Gems Required: Mixed size assortment ($SS3, SS6, SS10, SS16$) of AB-coated flatback crystals.
- Placement Technique (Scatter Fill): Spread a generous layer of thick builder resin over the entire nail plate. Place your largest $SS16$ focal stones first, cluster medium $SS10$ stones around them, and fill every remaining micro-gap with tiny $SS3$ stones. Full cure under LED for 90 seconds.
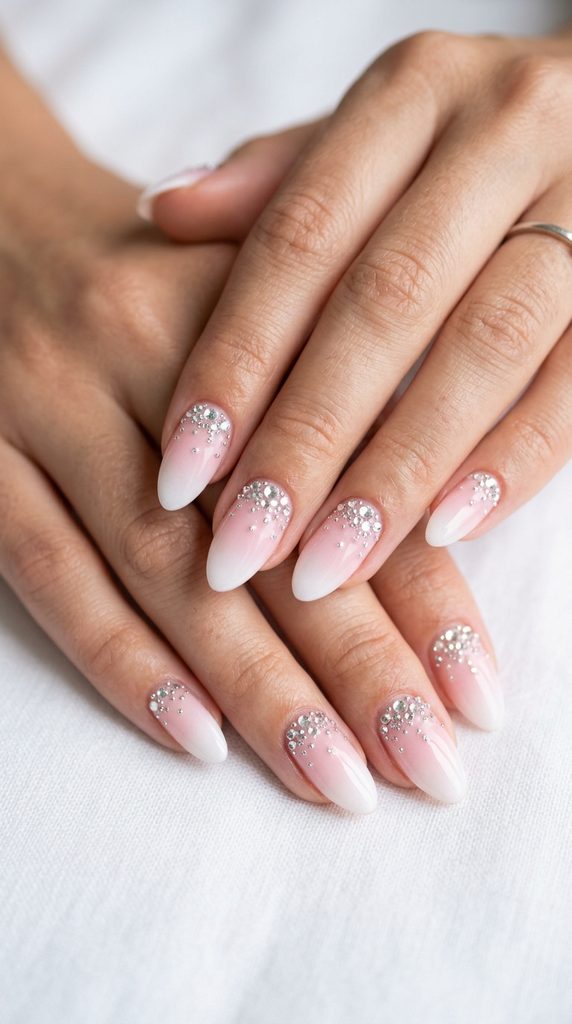
4. Milky White Ombré with Cascading Crystal Rain
Combine a soft, diffused French ombré (baby boomer) base with a gradual cascade of crystals that scatter downward from the cuticle toward the translucent free edge.
Technical Specs & Application Workflow
- Base Polish: Pink-to-white gradient baby boomer gel base with a glossy top coat finish.
- Gems Required: $SS3, SS6, SS8$ clear flatback rhinestones and micro-bullion caviar beads.
- Design Strategy: Concentrate the densest cluster of stones right at the cuticle line. As you move toward the middle of the nail plate, space the stones further apart, mixing in tiny metallic caviar beads to simulate a sparkling rainfall effect.
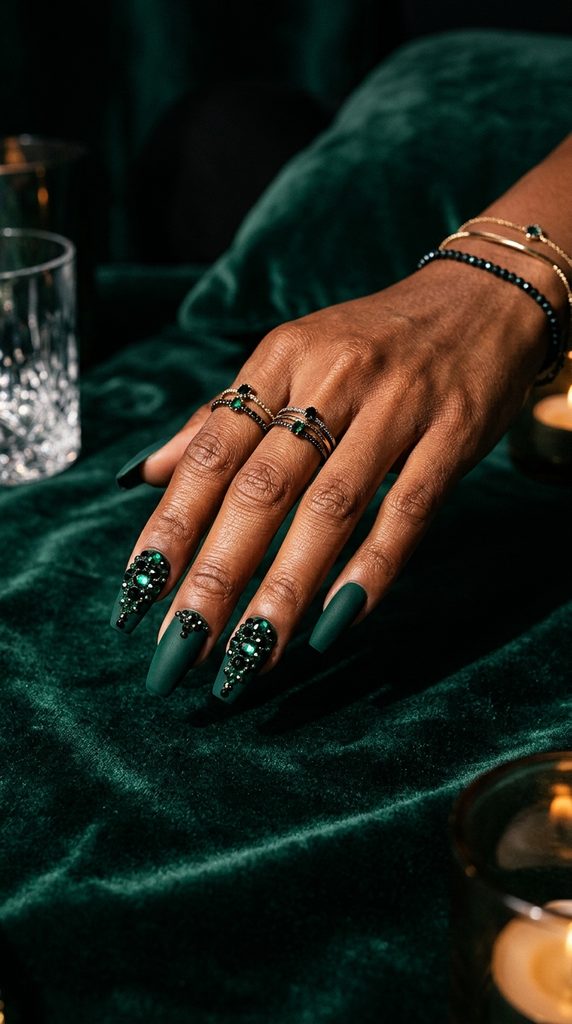
5. Gothic Velvet Matte with Dark Emerald & Jet Black Crystals
Contrast rich, light-absorbing matte velvet base colors with deep, reflective dark gem accents for a sophisticated, moody aesthetic.
Technical Specs & Application Workflow
- Base Polish: Matte black, deep plum, or rich forest green velvet top coat over dark gel polish.
- Gems Required: Jet black, emerald green, or dark sapphire $SS6\text{ and }SS10$ flatback crystals.
- Application Best Practices: Apply your velvet matte top coat to all nails and cure completely first. Then, place tiny drops of glossy gem resin where you want your dark crystals located. The high contrast between non-reflective matte polish and glistening dark facets produces a dramatic look.
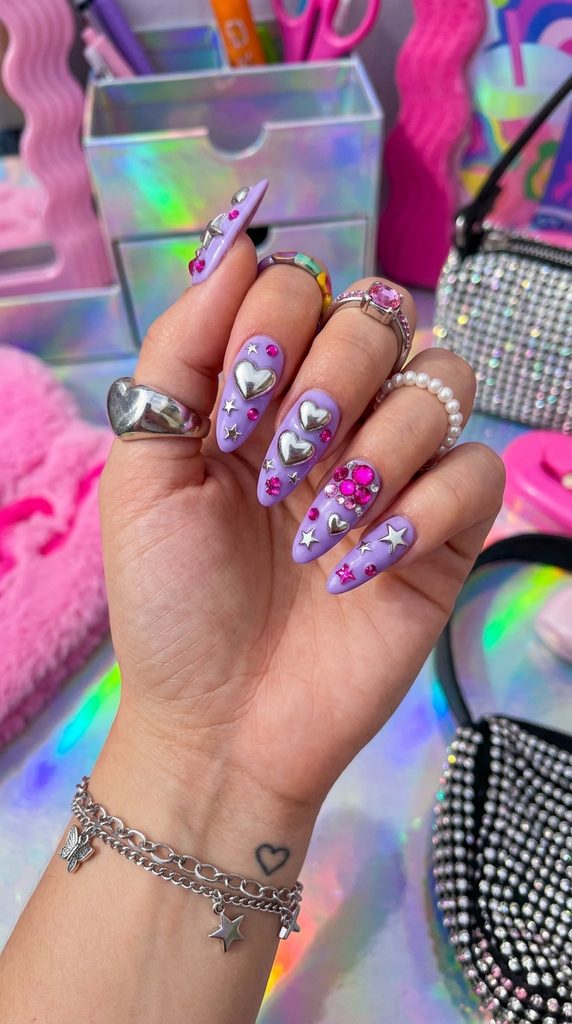
6. Y2K Chunky Charm Suite with Stars & Heart Clusters
Embrace vibrant retro-pop energy by pairing colorful gel bases with oversized 3D metal alloy charms, hollow star shapes, and candy-colored rhinestones.
Technical Specs & Application Workflow
- Base Polish: Bright lavender, hot pink, or sky blue gel polish.
- Charms & Gems: 3D silver heart/star alloy charms, $SS12$ iridescent pink rhinestones, and liquid glass drops.
- Securing Heavy 3D Charms: Apply a generous dollop of thick structural builder gel or acrylic bead directly on the nail apex. Press the flat back of the 3D metal charm into the uncured gel until it sinks in slightly, then encapsulate the charm perimeter with gel before curing.
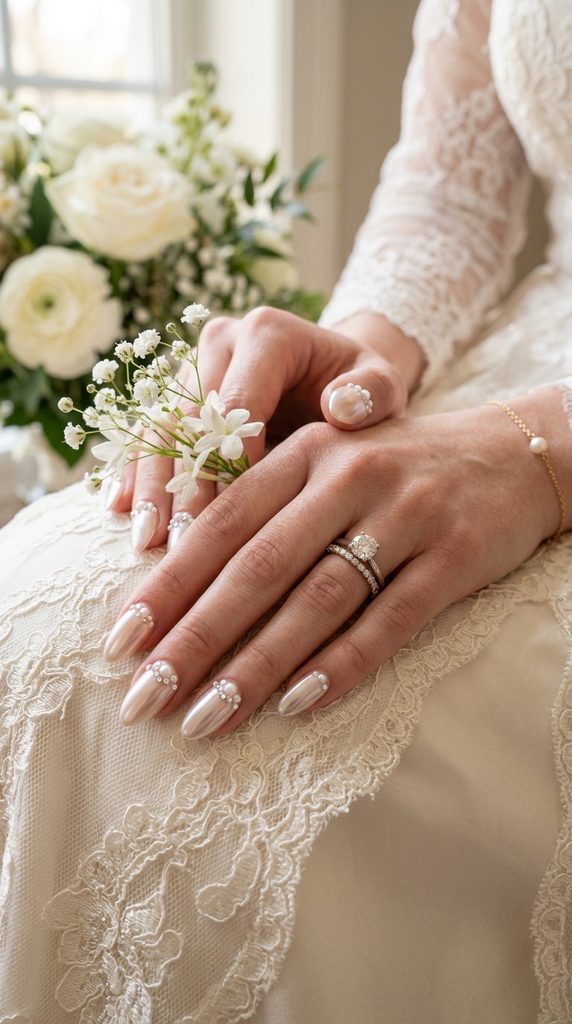
7. Pearl & Crystal Cluster Wedding Suite
Craft soft, ethereal bridal nails by intertwining creamy flatback pearls with brilliant clear crystals and iridescent shimmer bases.
Technical Specs & Application Workflow
- Base Polish: Soft pearl chrome powder over a sheer ivory gel base.
- Gems Required: $2\text{mm} – 4\text{mm}$ half-pearl cabochons paired with $SS4\text{ and }SS8$ clear glass rhinestones.
- Styling Best Practices: Cluster 3 small pearls and 2 clear rhinestones near the side sidewall of the nail bed, leaving the rest of the pearl chrome nail surface clear. This creates a refined balance suitable for wedding events.
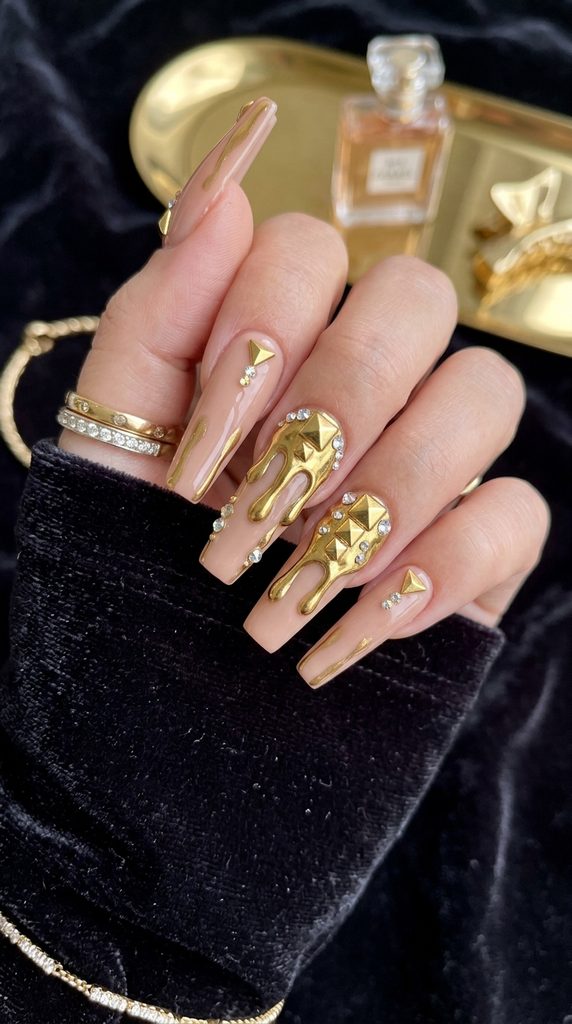
8. Metallic Drip with Liquid Gold Studs & Rhinestone Edges
A dramatic contemporary look featuring 3D chrome drip effects paired with structured geometric studs and sparkling crystal borders.
Technical Specs & Application Workflow
- Base Polish: Nude or sheer black gel background.
- Gems & Hardware: Liquid silver/gold chrome gel, metallic pyramid studs, and $SS6$ clear crystals.
- Workflow Mechanics: Draw raised 3D drips using hard builder gel, cure, and rub with metallic chrome powder. Set small metallic studs and clear crystals directly along the drip edges using gem gel to create a molten jewelry effect.
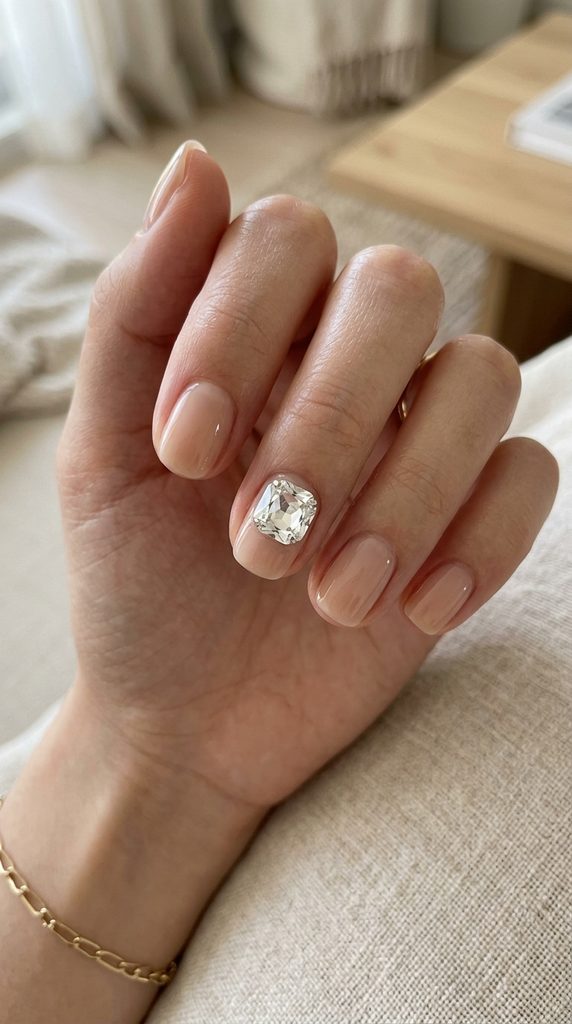
9. Minimalist Single Solitaire Gem Placement
A clean, modern approach to embellishment that features a single high-clarity large crystal resting on an ultra-clean, neutral canvas.
Technical Specs & Application Workflow
- Base Polish: High-shine semi-sheer beige, pale pink, or crystal clear glass gel.
- Gems Required: Single $SS16\text{ or }SS20$ high-grade cushion-cut or teardrop crystal per hand.
- Placement Strategy: Position the single solitaire gem centrally, roughly 2 millimeters above the cuticle crescent on the middle finger or thumb. This minimalist placement adds subtle luxury without visual clutter.
10. Iridescent Mermaid Scales with Opal Rhinestones
Inspired by sea-glass tones, this design uses shimmering opal rhinestones over an iridescent mermaid chrome base for a soft, shifting pastel glow.
Technical Specs & Application Workflow
- Base Polish: Mermaid powder chrome over light mint green or periwinkle gel polish.
- Gems Required: White opal, pink opal, and Pacific opal $SS6\text{ and }SS10$ rhinestones.
- Visual Effect: Opal rhinestones lack dark foil backings, allowing light to pass through their milky, semi-translucent facets. Pair them with pastel chrome bases for a soft, ethereal shimmer.