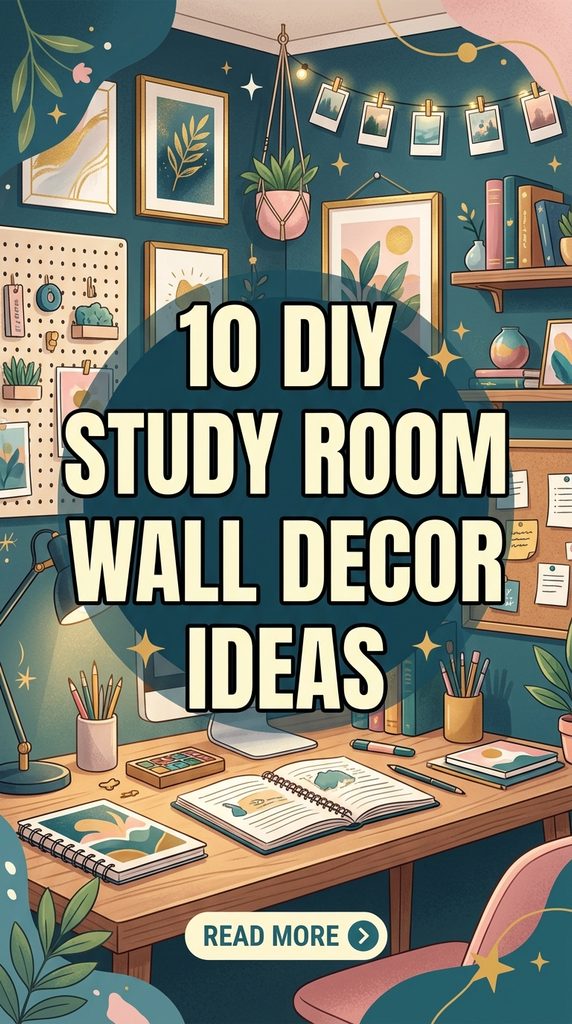
A well-designed study environment directly influences focus, cognitive retention, and everyday productivity. Transforming blank study room walls into functional, aesthetically inspiring surfaces does not require expensive contractor installations or commercial-grade renovations. With intentional spatial planning and simple do-it-yourself techniques, you can build custom wall decor that balances organization with creative design.
The key to effective study wall design lies in combining tactile productivity tools—such as schedule boards, pegboards, and acoustic panels—with personal visual anchors. Each project must serve a clear purpose: eliminating desktop clutter, reducing ambient noise, displaying critical notes, or providing a calming visual break during long focus sessions.
Here is an architectural guide to ten DIY study room wall decor ideas, complete with material requirements, step-by-step build breakdowns, spatial mounting clearances, and ergonomics.
Spatial Ergonomics & Wall Clearance Principles
Before installing any DIY wall decor above a desk or reading nook, follow these ergonomic standards:
1. The Ergonomic Reach Zone
- Daily Utility Items: Mount daily organization tools (like weekly planners, pegboards, and pen cups) between $8\text{ and }16\text{ inches}$ above the desk surface. This allows you to reach supplies while seated without straining your back or reaching unnaturally.
- Focal Visual Items: Center art installations, motivational quote grids, and mood boards at standard eye level—approximately $57\text{ to }60\text{ inches}$ from the floor to the center of the display.
2. Weight Capacity & Wall Anchor Guidelines
Always evaluate wall types before mounting DIY projects:
- Drywall Installations: For lightweight items under $10\text{ lbs}$ (cork tiles, canvas art), use standard plastic drywall anchors. For heavier items over $15\text{ lbs}$ (wooden pegboards, floating book ledges), drive mounting screws directly into wooden wall studs or use toggle bolts.
1. The Oversized Frame Acrylic Dry-Erase Wall Calendar
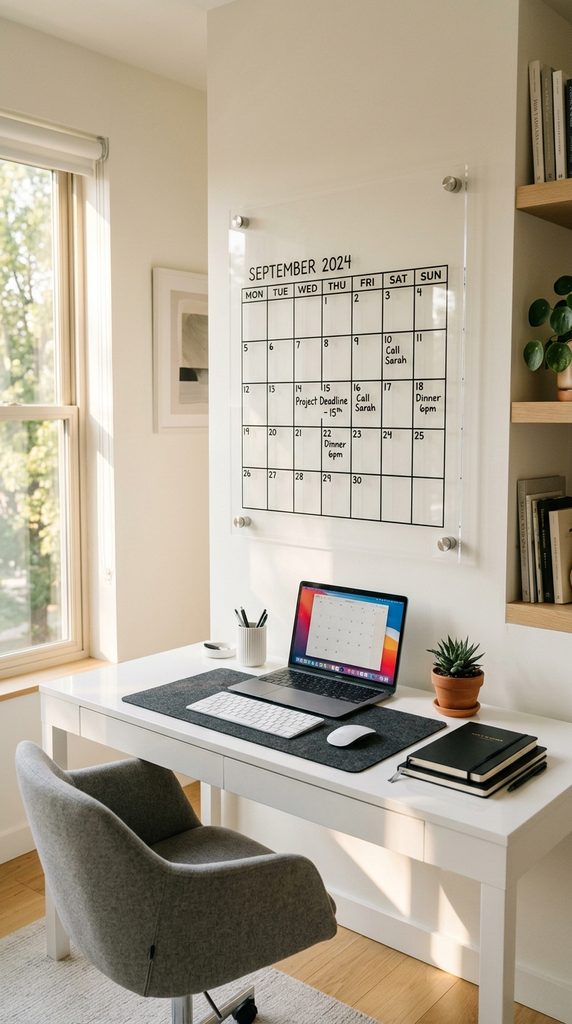
A custom acrylic dry-erase calendar provides a sleek, modern layout for tracking assignment deadlines, exam schedules, and weekly milestones without the mess of traditional chalkboards.
Materials & Build Breakdown
- Materials Required: A $24\times36\text{-inch}$ clear acrylic sheet ($1/4\text{-inch}$ thick), stainless steel wall standoff mounts, thin black vinyl striping tape, and dry-erase markers.
- Build Workflow: Apply vinyl striping tape to the backside of the acrylic sheet to create a permanent 7-column monthly grid. Drill pilot holes in all four corners of the acrylic sheet. Mount the board onto the wall using steel standoffs so it floats $1\text{ inch}$ off the wall surface.
- Productivity Value: Writing on the front surface leaves the vinyl grid lines on the back protected from marker friction, ensuring clean, scratch-free wiping every month.
- Study Style Pairing: Complements modern minimal, urban Scandinavian, and contemporary home office spaces.
2. Geometric Felt Acoustic Sound-Dampening Tile Grid
Hard wall surfaces bounce sound waves around the room, creating subtle echo and auditory fatigue during video calls or intense study sessions. DIY geometric acoustic tiles absorb sound while adding colorful 3D wall texture.
Materials & Build Breakdown
- Materials Required: High-density acoustic felt sheets ($9\text{mm}$ to $12\text{mm}$ thick), a utility knife, a steel straightedge ruler, and damage-free removable mounting strips.
- Build Workflow: Cut felt sheets into uniform $10\text{-inch}$ hexagons or equilateral triangles. Draft a honeycomb pattern on the wall using painter’s tape. Mount the felt tiles in an interlocking geometric array directly behind your computer monitor or adjacent side wall.
- Functional Value: Reduces room reverb and dampens ambient household noise, creating a quieter acoustic environment for concentration.
- Study Style Pairing: Ideal for tech-focused study rooms, podcast setups, and modern study nooks.

3. Modular Framed Wooden Pegboard System
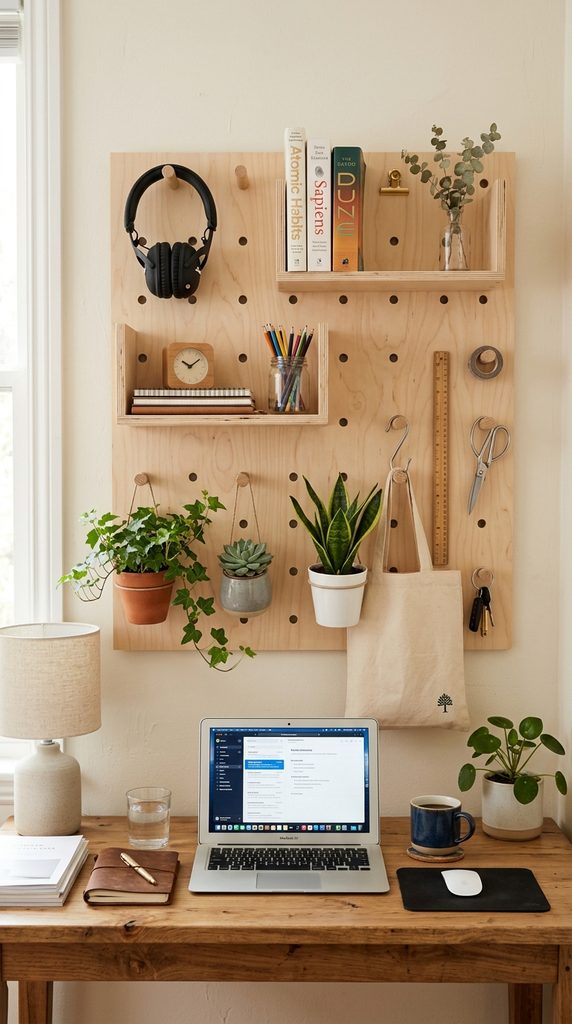
A modular wooden pegboard transforms empty vertical wall space into an adaptable storage zone for headphones, stationery, plant pots, and study timers.
Materials & Build Breakdown
- Materials Required: A $24\times48\text{-inch}$ birch plywood pegboard sheet ($1/4\text{-inch}$ or $1/2\text{-inch}$ thick), $2\times1\text{-inch}$ wood furring strips for back framing, wooden dowel rods ($1/2\text{-inch}$ diameter), and small plywood shelf slats.
- Build Workflow: Screw furring strips around the back edge of the pegboard to create a $1\text{-inch}$ gap between the board and the wall. Secure the frame into wall studs. Sand dowels and cut shelf slats to fit across dowel pairs.
- Adaptability: Rearrange dowels and shelf slats at any time to hold heavier books, hanging task lights, or decorative succulents as your storage needs change.
4. Minimalist Wire Mesh Vision & Task Grid
A lightweight steel wire grid offers a flexible, open frame for clipping formula sheets, flashcards, inspirational prints, and task checklists within your direct line of sight.
Materials & Build Breakdown
- Materials Required: Steel concrete reinforcing wire mesh panel (cut to $24\times36\text{ inches}$), spray paint (matte black, gold, or white), cable wall clips, and mini wooden clothespins or binder clips.
- Build Workflow: Sand raw metal edges smooth and apply two coats of rust-inhibiting spray paint. Secure the grid flat against the wall using four heavy-duty screw-in cable clamps.
- Styling Strategy: Use metallic binder clips to attach study schedules, project deadlines, and motivational photography without damaging paper corners with pushpins.

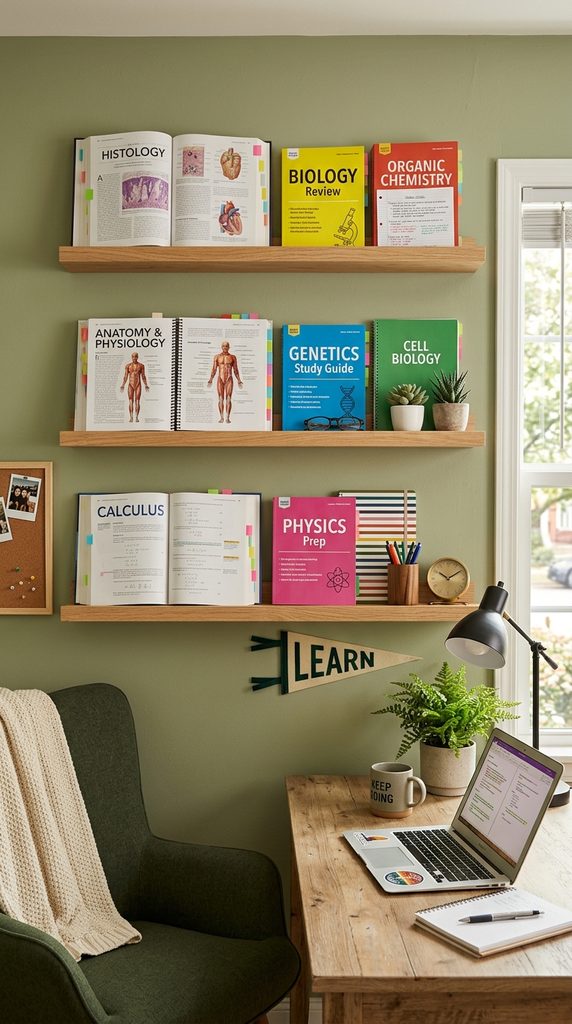
5. Industrial Architectural Floating Book Ledges
Displaying textbook covers and reference guides face-out along slender wall ledges transforms study materials into functional wall decor while keeping desk surfaces clear.
Materials & Build Breakdown
- Materials Required: $1\times4\text{-inch}$ pine boards for the base, $1\times2\text{-inch}$ boards for the back lip, and $1\times1\text{-inch}$ square dowels for the front retaining lip; wood glue, trim screws, and wood stain.
- Build Workflow: Assemble the boards into a narrow U-channel shelf using wood glue and countersunk trim screws. Stain or paint the wood, then mount the shelf into wall studs using a spirit level.
- Ergonomic Advantage: Keeps current reading assignments and reference manuals open to specific pages right at eye level, saving flat desk space.
6. Framed Rolled Cork Bulletin Accent Wall
Generic small corkboards quickly become crowded and messy. Installing framed cork sheets creates an expansive pinboard zone for mapping out research papers and brainstorming complex ideas.
Materials & Build Breakdown
- Materials Required: High-density natural cork roll ($1/4\text{-inch}$ thickness), $1/4\text{-inch}$ plywood backing board, wooden picture frame moulding or trim strips, and heavy-duty contact adhesive.
- Build Workflow: Unroll and adhere the cork sheet onto the plywood backing using contact adhesive. Trim frame moulding to size with a miter box, nail it around the outer perimeter, and mount the entire unit securely onto the main study wall.
- Study Workflow: Use color-coded pushpins and string to build visual mind maps, timeline connections, and project workflows across the large surface.

7. Hanging Canvas Scroll Quote & Formula Banner
A vintage-style hanging canvas scroll provides an artistic way to display key math formulas, coding syntax, vocabulary lists, or personal quotes above a desk.
Materials & Build Breakdown
- Materials Required: Unbleached heavy cotton duck canvas fabric, two half-round wooden dowel strips ($1\text{-inch}$ wide), leather cord, fabric paint or vinyl lettering, and hot glue.
- Build Workflow: Cut canvas to size ($18\times36\text{ inches}$) and fray the side edges slightly for texture. Hand-paint or transfer your desired study reference notes or quotes onto the canvas. Clamp the top and bottom fabric edges between the wooden dowels, glue them shut, and tie a leather cord around the top dowel to hang it from a brass wall hook.

8. Repurposed Clipboard Wall Gallery for Active Projects
Using a grid of matching wooden clipboards creates a dynamic gallery wall where papers, art prints, and ongoing assignment sheets can be swapped out instantly.
Materials & Build Breakdown
- Materials Required: Six to nine matching hardboard or raw wood clipboards ($9\times12.5\text{ inches}$), picture-hanging Command strips, and printed reference sheets or motivational art.
- Build Workflow: Mark a balanced grid layout on the wall (3 rows of 3) using a laser level, leaving $2\text{ to }3\text{ inches}$ of space between clipboards. Mount each clipboard using damage-free adhesive strips.
- Workflow Advantage: Unclip active assignment sheets, work on them at your desk, and clip them back onto the wall when finished to keep active projects organized.

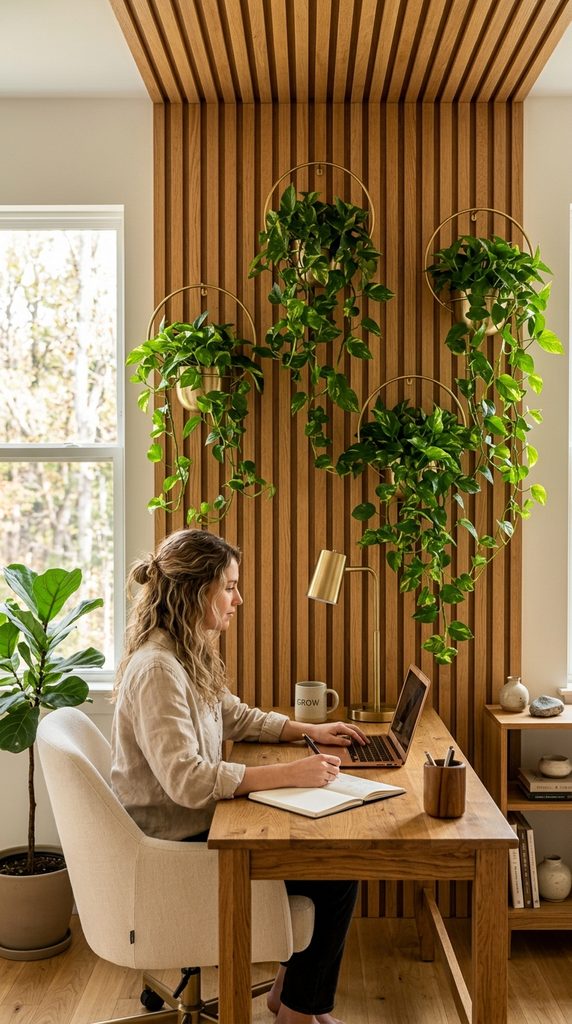
9. Slanted Wood Slat Wall Mount for Hanging Greenery
Bringing living plants into a study space improves indoor air quality and provides visual relief during mental breaks. A slatted wooden wall frame holds small pots directly above the desk setup.
Materials & Build Breakdown
- Materials Required: $1\times2\text{-inch}$ cedar or pine slats, wood stain, brass ring planters, and small lightweight pots containing low-maintenance indoor plants (like pothos or succulents).
- Build Workflow: Construct a vertical ladder-style frame by screwing parallel slats across two vertical side runners. Mount brass plant ring holders onto the slats at staggered heights, then insert small potted plants into the rings.
- Biophilic Benefits: Exposure to indoor plants during study hours helps lower stress levels, reduce eye fatigue, and improve focus.
10. Split-Tone Color-Blocked Paint Arch Wall Mural
Using paint to create a bold geometric arch or color block defines a distinct “study zone” within a shared bedroom or studio apartment without building physical partitions.
Materials & Build Breakdown
- Materials Required: Interior wall paint in a muted accent color (like sage green, warm terracotta, or dusty blue), painter’s tape, a pencil, string, and a small painter’s nail.
- Build Workflow: Tie a pencil to string anchored by a nail to swing a smooth arch outline above your desk space. Mask the straight vertical sides with painter’s tape. Paint two coats inside the outline, then peel the tape while the paint is still slightly damp for crisp lines.
- Zoning Impact: Visually separates the study desk area from relaxation zones in multi-use rooms, signaling to your brain that it is time to focus when sitting within the painted frame.