There is a profound joy in transforming the ordinary into the extraordinary. In the world of crafting, few materials are as humble, accessible, and surprisingly versatile as the wooden craft stick. Often associated with elementary school art projects, these simple pieces of birchwood possess immense potential for sophisticated, high-end design.
With the right techniques—such as precise staining, geometric assembly, and the integration of mixed media—craft sticks can be upcycled into stunning, minimalist home accents that rival boutique finds.
If you are looking to infuse your living space with warmth, texture, and a clean, modern aesthetic, look no further. This comprehensive guide explores ten curated, design-forward craft projects, complete with step-by-step concepts, styling tips, and advanced techniques to ensure your finished pieces look entirely professional.
The Modern Craft Aesthetic: Tools and Techniques for Professional Results
Before diving into the projects, achieving a premium finish requires moving past basic school glue and vibrant primary poster paints. To create items that seamlessly blend into a contemporary, organic modern, or bohemian interior, consider upgrading your toolkit with the following essentials:
- Wood Stains and Tints: Instead of opaque acrylics, opt for water-based or oil-based wood stains in tones like walnut, weather-beaten gray, or rich oak. This allows the natural grain of the wood to peek through, instantly elevating the look.
- Precision Cutting Tools: A pair of heavy-duty miter shears or a sharp utility knife paired with a metal ruler will ensure clean, angled cuts for geometric patterns.
- Adhesives Matter: While a high-quality hot glue gun is excellent for quick mockups, wood glue (polyvinyl acetate) provides a stronger, permanent bond that prevents warping over time.
- Finishing Seals: A coat of matte clear sealant, polycrylic, or even furniture wax protects your creation and gives it a smooth, touchable texture that mimics store-bought decor.
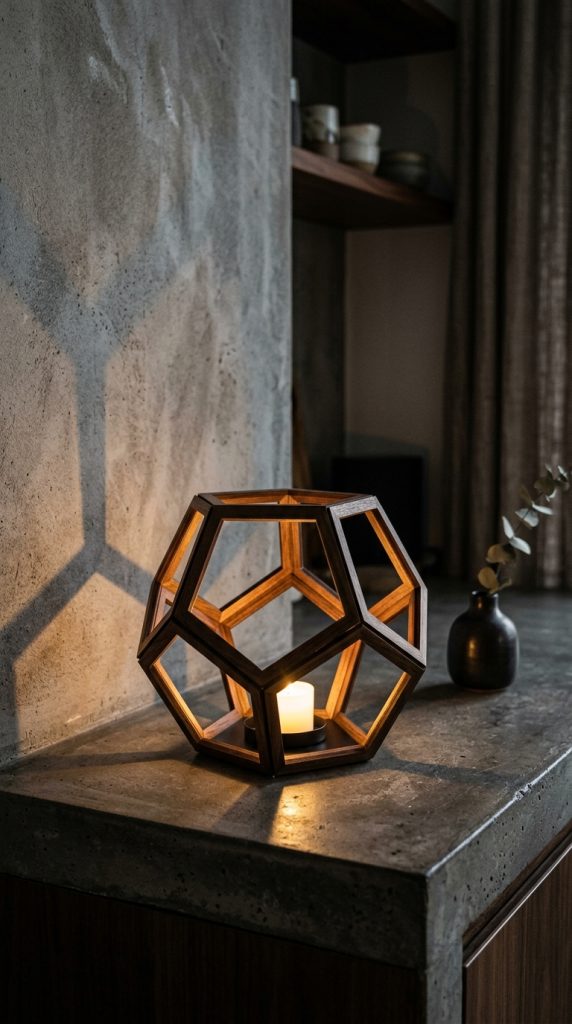
1. The Architectural Geometric Lanterns
Lighting plays a crucial role in interior styling, and these architectural lanterns offer a beautiful interplay of shadow and light. By building a hollow, three-dimensional geometric frame, you can create a centerpiece that feels both structural and delicate.
Materials Needed
- Standard craft sticks (approximately 40–50 per lantern)
- Wood glue
- Walnut or espresso wood stain
- LED flameless tea lights or fairy lights
- Miter shears for precise cutting
Step-by-Step Guide
- Design the Base: Create a perfect square or hexagon by overlapping the ends of the sticks and securing them with a drop of wood glue. This will dictate the footprint of your lantern.
- Build the Vertical Pillars: Carefully cut the rounded tips off the sticks to create crisp, flat edges. Glue these vertically at each corner of your base shape.
- Construct the Geometric Lattice: Cross-brace the vertical pillars by gluing sticks diagonally or horizontally, creating a series of open windows or alternating triangular patterns.
- Stain and Seal: Once the glue has completely cured, apply a dark wood stain using a foam brush. Wipe away the excess to highlight the joints and grain.
- Illuminate: Place an LED flameless candle inside. The open woodwork will cast intricate, moody shadows across your walls, perfect for cozy evening ambiances.
Styling Tip
Group three lanterns of varying heights on a entryway console table or a fireplace mantle, surrounded by dried eucalyptus strands for an organic, inviting look.
2. Scandinavian-Inspired Chevron Wall Art
Chevron and herringbone patterns are staples of Scandinavian design. This project utilizes the natural variation in wood grain to create a striking piece of textured wall art that looks like an expensive salvage-wood installation.
Materials Needed
- A sturdy plywood canvas or heavy cardboard backing (12×12 or 11×14 inches)
- 100+ standard craft sticks
- Utility knife
- Wood stains in three coordinating shades (e.g., natural, light oak, dark walnut)
- Strong wood adhesive
Step-by-Step Guide
- Prep the Sticks: Sort your sticks into three piles and stain each pile a different shade. Leave a few entirely natural for maximum contrast.
- Cut the Angles: Using your utility knife or shears, cut the rounded ends off the sticks at a precise 45-degree angle. This allows them to flush up against one another to form the chevron “V” shape.
- Find the Centerline: Draw a perfectly straight vertical line down the center of your backing board. This will serve as your anchor guide.
- Lay the Pattern: Starting from the top of the centerline, place your first angled stick pointing downward at a 45-degree angle. Place its matching pair on the opposite side of the line to form a chevron point. Alternate your stained colors as you work your way down the board.
- Trim the Edges: Once the entire board is covered and the glue is dry, use a saw or heavy cutter to trim any stick ends hanging over the perimeter of the backing board. Frame the piece with thin wooden trim if desired.
Styling Tip
Hang this statement piece in a gallery wall alongside minimalist line art and black-and-white photography to ground the display with warmth and texture.

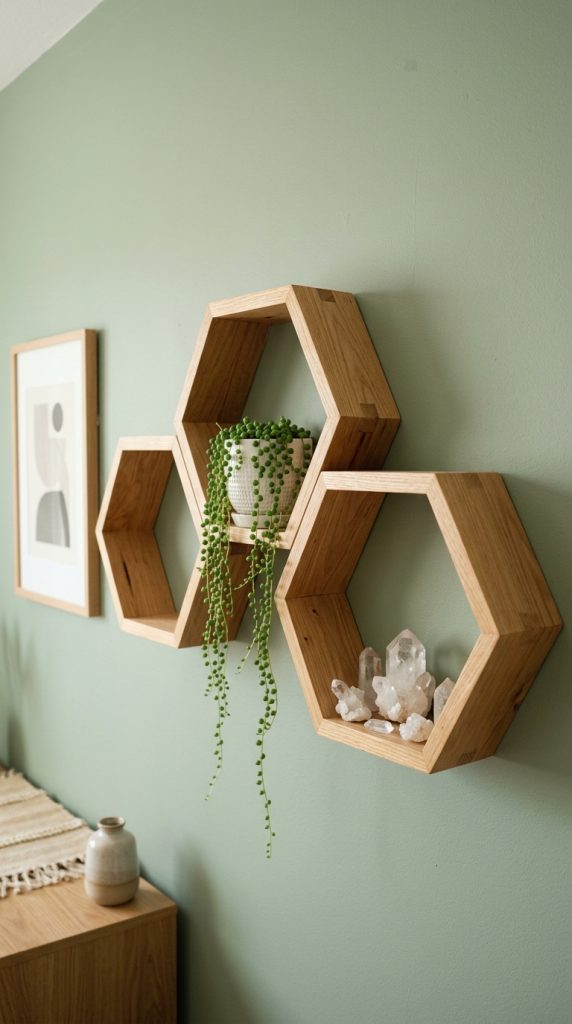
3. Minimalist Hexagon Honeycomb Shelving
Honeycomb shelves are incredibly popular for displaying small trinkets, air plants, or crystals. Building them out of craft sticks is surprisingly simple, yet the layered depth gives them a substantial, high-quality look.
Materials Needed
- Approximately 100 sticks per hexagon
- A printed template of a perfect hexagon (easily found online)
- Wood glue
- Matte black acrylic paint or a rich oak stain
Step-by-Step Guide
- Set the Template: Place your printed hexagon template on a flat work surface. This will ensure your angles remain uniform throughout the entire build.
- Lay the First Layer: Arrange six craft sticks along the lines of the template, overlapping the ends. Glue the overlapping corners securely.
- Build the Depth: Continue adding layers of sticks directly on top of the first layer, repeating the pattern. To make a shelf sturdy enough to hold lightweight objects, you will need to stack the sticks roughly 15 to 20 layers deep.
- Let it Cure: Allow the structure to dry completely overnight under a heavy book to ensure the layers fuse perfectly flat.
- Finish the Wood: Coat the entire shelf in a sleek matte black paint for a modern, industrial vibe, or use a warm oak stain for a mid-century modern look.
Styling Tip
Create a cluster of three interlocking hexagon shelves on a blank bedroom wall. Nestled inside, place a small trailing pothos plant or a polished crystal cluster.
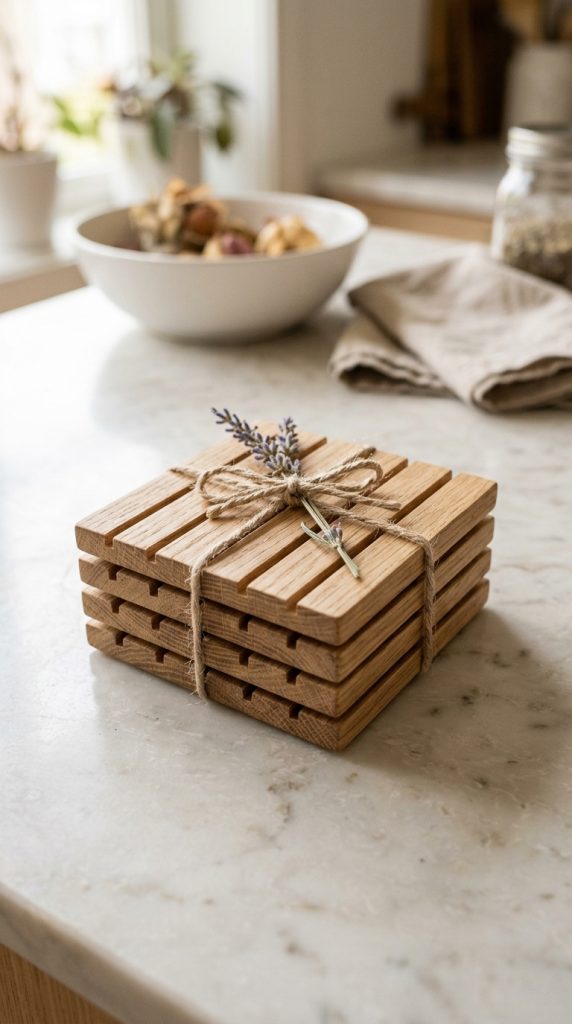
4. Woven-Look Japandi Coasters
Japandi style—the beautiful fusion of Japanese minimalism and Scandinavian functionality—relies heavily on clean lines and natural materials. These coasters utilize a woven, slatted design that feels incredibly intentional and clean.
Materials Needed
- Standard and jumbo-sized craft sticks
- Fine-grit sandpaper
- Waterproof clear polyurethane sealant
- Wood glue
Step-by-Step Guide
- Create the Base Rails: Cut two jumbo craft sticks to equal lengths (about 4 inches) with square edges. Lay them parallel to each other, spaced about 3.5 inches apart.
- Attach the Slats: Cut standard craft sticks to 4-inch lengths with square edges. Glue them horizontally across the two base rails, leaving a precise 2mm gap between each stick. The gaps give the coaster a light, slatted, architectural look.
- Sand the Edges: Once dry, use fine-grit sandpaper to smooth out any rough edges or imperfections along the sides and corners.
- Waterproof Coating: Because these will hold cold drinks, seal them thoroughly with at least two coats of waterproof polyurethane to protect the wood from condensation stains.
Styling Tip
Tie a stack of four coasters together with a piece of raw twine and a sprig of dried rosemary to create a gorgeous, thoughtful housewarming gift.
5. Mid-Century Modern Plant Pot Cover
Dress up plain plastic nursery pots with a custom, mid-century modern-inspired wooden wrap. The vertical lines of the wood sticks elongate the pot, making your indoor plants look curated and expensive.
Materials Needed
- A cylindrical container (like a clean tin can or an old plastic pot)
- Jumbo craft sticks
- Wood stain (warm cherry or teak finishes work beautifully)
- Hot glue or heavy-duty construction adhesive
Step-by-Step Guide
- Measure and Trim: Measure the height of your cylindrical container. Trim your jumbo craft sticks so they sit just a quarter-inch taller than the rim of the pot. Ensure all cuts are straight and uniform.
- Stain the Elements: Apply your chosen wood stain to the front, back, and sides of each stick before assembling. This ensures no raw wood peeks through the seams.
- Adhere Vertically: Starting at one point on the cylinder, apply glue to the back of a stick and press it vertically against the container.
- Wrap the Perimeter: Continue gluing the sticks tightly side-by-side all the way around the cylinder. If the final stick is too wide, trim it lengthwise using a utility knife.
- Add Minimalist Detailing: Optionally, wrap a thin strip of leather or a piece of black cotton cord around the center of the pot for an added layer of texture.
Styling Tip
Drop a vibrant green snake plant or a structural succulent into this pot cover and place it on a sunny windowsill or a tiered plant stand.

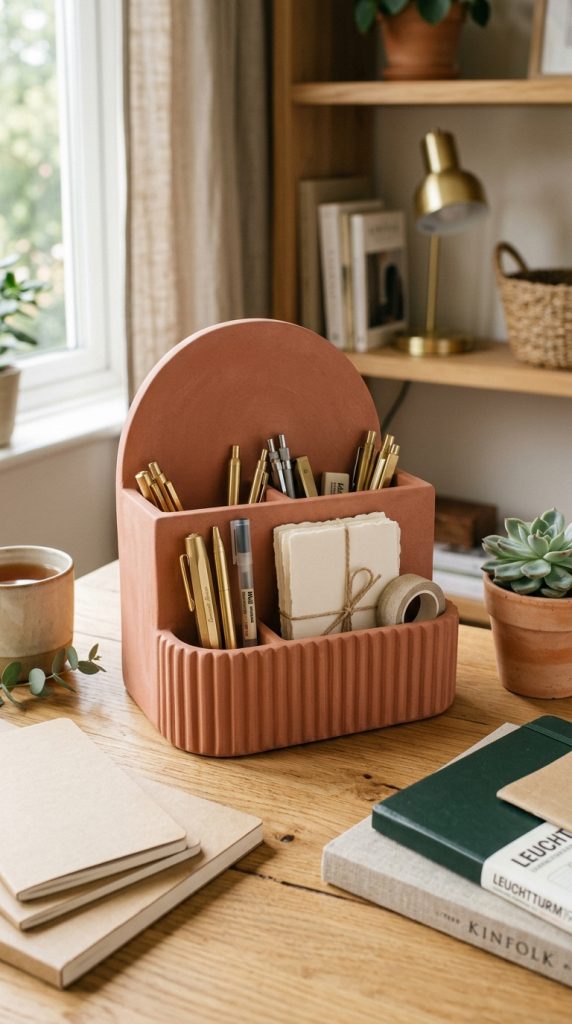
6. The Fluted Arch Desk Organizer
Fluted textures and soft arch shapes are dominant trends in modern interior styling. This desk organizer combines both, providing a sophisticated home for pens, stationery, or makeup brushes.
Materials Needed
- An empty oval or rectangular cardboard box (like a tea box)
- Standard craft sticks
- Sandpaper
- Terracotta or soft beige chalk paint
Step-by-Step Guide
- Shape the Arch Backing: Cut a piece of heavy cardboard into an elegant arch shape that extends several inches higher than your base box. Cover the front of this arch with vertically aligned craft sticks, trimming them to fit the curved top profile.
- Create the Fluted Front: Take your base box and begin gluing craft sticks vertically around its outer walls, creating a tight, ribbed, or “fluted” texture.
- Combine the Elements: Glue the fluted front box to the base of your arched backing piece.
- Apply Chalk Paint: To give the piece a ceramic, artisanal look, coat the entire organizer in a matte chalk paint. Earthy tones like terracotta, sage green, or soft cream work best.
- Distress Slightly: Once dry, lightly run fine sandpaper over the raised ridges of the sticks to reveal just a hint of the wood beneath, adding depth to the texture.
Styling Tip
Place this on a home office desk alongside a brass desk lamp and a linen notebook to curate a calm, inspiring workspace.
7. Bohemian Sunburst Mirror
Sunburst mirrors bring an instant sense of energy and brightness to a room. By layering craft sticks of varying lengths, you can create a striking, bohemian wall accent that mimics high-end rattan or bamboo decor.
Materials Needed
- A small round craft mirror (4 to 6 inches in diameter)
- A circular wooden or cardboard backing (slightly larger than the mirror)
- Standard craft sticks
- Metallic gold spray paint or light oak stain
- Heavy-duty adhesive
Step-by-Step Guide
- Prepare the Backing: Mark the exact center of your circular backing board. This is where your mirror will eventually sit.
- Cut Varied Lengths: Cut your craft sticks into three distinct lengths: full length, three-quarter length, and half-length. Point the tips slightly if you prefer a sharper sunburst look.
- Lay the Primary Rays: Glue the full-length sticks around the circular backing like the numbers on a clock (12, 3, 6, and 9 o’clock), extending outward. Fill in the gaps between them evenly.
- Layer for Depth: Take the medium-length sticks and glue them in the spaces between the long rays, slightly overlapping them at the base. Finally, add the shortest sticks on top to create a lush, dimensional, tiered effect.
- Finish and Mount Mirror: Spray paint the entire wooden structure in a soft metallic gold or apply a warm wood stain. Once dry, glue the round mirror firmly to the center, hiding all the inner raw edges of the sticks.
Styling Tip
Hang this mirror in a small powder room or above a bedside table to bounce light around the room and create a beautiful focal point.

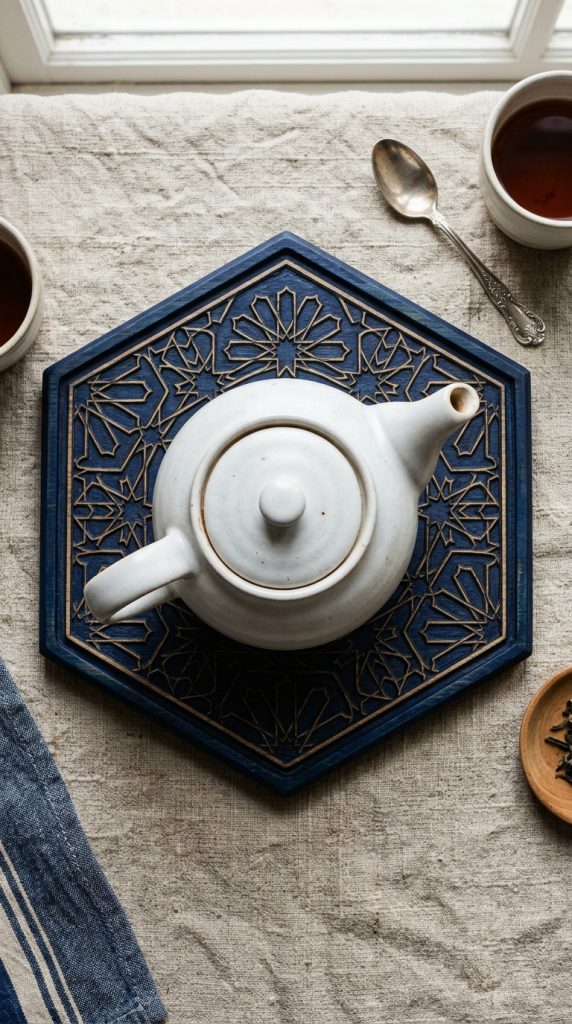
8. Intricate Moroccan-Style Trivets
Protect your dining table with style. These trivets borrow design cues from complex Moroccan tilework, using interlocking geometric lines to form a functional piece of art.
Materials Needed
- Standard craft sticks
- Fine-tipped wood burning tool (optional for detailing)
- Deep indigo or rich teal wood stain
- Heat-resistant clear coat
Step-by-Step Guide
- Design the Grid: On a piece of paper, sketch out an interlocking square or star pattern. A simple interlocking square grid (where squares rotate at 45-degree angles over each other) is highly effective.
- Cut to Length: Measure and cut the sticks to form your chosen geometric web. Clean, square-cut edges are vital here so the joints fit seamlessly without large gaps.
- Assemble and Glue: Using wood glue, piece the pattern together on top of your sketch shield, gluing the overlapping nodes securely.
- Add Pyrography Details: If you have a wood-burning tool, score delicate lines or small dots along the surface of the wood to mimic traditional tile engravings.
- Stain and Protect: Stain the wood in a deep, moody hue like indigo, charcoal, or teal. Seal with a heavy-duty, heat-resistant varnish so hot pots and teapots won’t damage the finish.
Styling Tip
When not in use, lean these trivets against the backsplash on your kitchen counter alongside open shelving and copper cookware for an effortless, curated look.
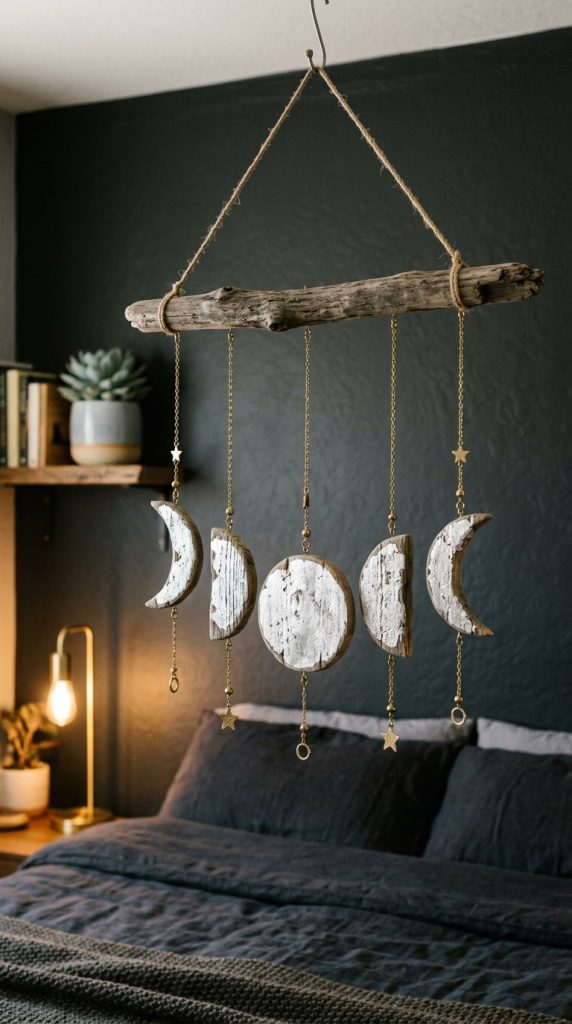
9. Tiered Hanging Moon Phase Garland
Celestial motifs add a dreamy, whimsical touch to bohemian and modern nurseries or bedrooms. This hanging garland uses craft sticks to form the various phases of the moon, suspended elegantly from a natural branch or dowel.
Materials Needed
- Standard craft sticks
- Strong thread, embroidery floss, or thin brass chain
- A small wooden dowel or a clean piece of driftwood
- Silver or charcoal metallic paint
Step-by-Step Guide
- Construct the Moons: To create the crescent shapes, glue craft sticks together at slight angles to form a curved crescent silhouette. For the full moon, lay sticks flat side-by-side and cut them into a perfect circle using a template and a utility knife.
- Craft the Phases: You will want to create five pieces: a central full moon, two half/gibbous moons, and two outer crescent moons.
- Paint the Elements: Coat each moon phase in a textured charcoal paint, then lightly sponge silver metallic paint over the surface to mimic craters and lunar textures.
- Assemble the Garland: Drill tiny holes into the tops and bottoms of the wood phases, or use hot glue to attach lengths of embroidery floss or brass chain to the back of each moon.
- Suspend from the Dowel: Tie the top strings of each moon phase to your piece of driftwood or dowel, spacing them evenly so they hang vertically in order of the lunar cycle.
Styling Tip
Hang this delicate celestial piece directly above a bed headboard or in front of a window where the light can catch the silver metallic details.
10. Organic Textured Tissue Box Cover
Hide unsightly, brightly colored cardboard tissue boxes with a gorgeous, high-end wooden cover that matches your organic modern bathroom or living room aesthetic.
Materials Needed
- A boutique-style square tissue box (to use as a size template)
- Jumbo and standard craft sticks
- Wood glue
- Bleached white or light driftwood wood stain
Step-by-Step Guide
- Build the Four Side Panels: Lay out jumbo craft sticks side-by-side to match the width of your template tissue box. Use two standard sticks glued horizontally across the back to hold them together, creating a solid wooden panel. Repeat this to make four identical walls.
- Construct the Top Lid: Create a fifth panel for the top. Measure the tissue dispensing slot of your template box and carefully cut out a neat, elongated oval or rectangle in the center of your wood panel.
- Assemble the Box: Glue the four side panels together at 90-degree angles to form a sleeve that slides easily over the tissue box. Attach the top lid securely.
- Sand to Perfection: Sand down all corners until they are slightly rounded and smooth, ensuring the joints look completely seamless and integrated.
- Stain Softly: Apply a light driftwood or weathered gray stain to give the wood a breezy, coastal, or minimalist appeal.
Styling Tip
Place this cover on your bathroom vanity alongside a ceramic soap dispenser and a small vase of dried bunny tails to establish a calming, spa-like atmosphere.