We’ve all seen the classic toilet paper roll crafts: the googly-eyed monsters, the basic seed starter cups, and the somewhat clunky binoculars. While those are fantastic for keeping toddlers entertained on a rainy afternoon, they don’t exactly scream “chic home decor.”
But what if you could take that humble, cardboard tube and transform it into something truly beautiful?
With a little imagination, some neutral paint, and the right techniques, toilet paper rolls can be upcycled into stunning, minimalist, and boho-chic decor pieces that look like they were plucked straight from a high-end boutique or a curated Pinterest board. Upcycling isn’t just eco-friendly; it’s a budget-friendly way to express your creativity.
Here is your ultimate guide to 10 aesthetic toilet paper roll crafts that bypass the clutter and embrace a clean, modern aesthetic.
1. Minimalist Faux-Ceramic Wall Art
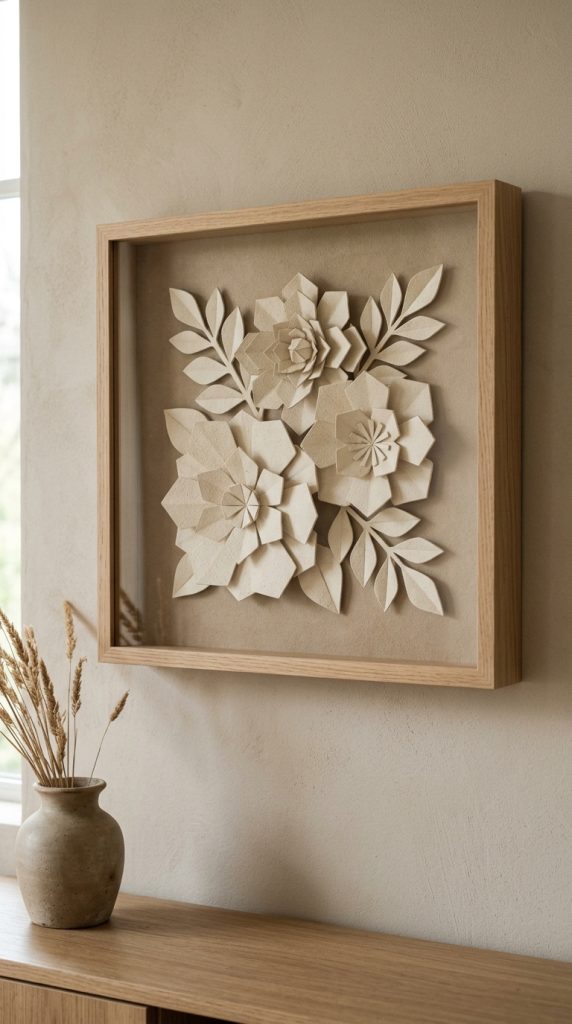
You don’t need expensive clay or a pottery wheel to achieve the coveted organic, textured look of modern ceramic art. A collection of cardboard tubes, a sharp utility knife, and some textured baking soda paint are all it takes to create a stunning 3D wall installation.
- The Cut: Flatten your toilet paper rolls slightly and slice them horizontally into 1/2-inch rings. This creates elegant, leaf-like marquise shapes.
- The Assembly: Glue the tips of the shapes together to form geometric flowers, overlapping waves, or abstract sunbursts. Assemble them inside a deep wooden shadow box frame.
- The Finish: Mix matte acrylic paint (think terracotta, soft beige, or warm cream) with a teaspoon of baking soda. This creates a gritty, chalky texture that perfectly mimics expensive ceramic stoneware.
Pro Tip: Keep the color palette monochromatic. Painting both the background canvas and the cardboard shapes the exact same shade of ivory creates a high-end, gallery-worthy shadow effect.
2. Faux-Wrought Iron Faux Crystals & Grilles
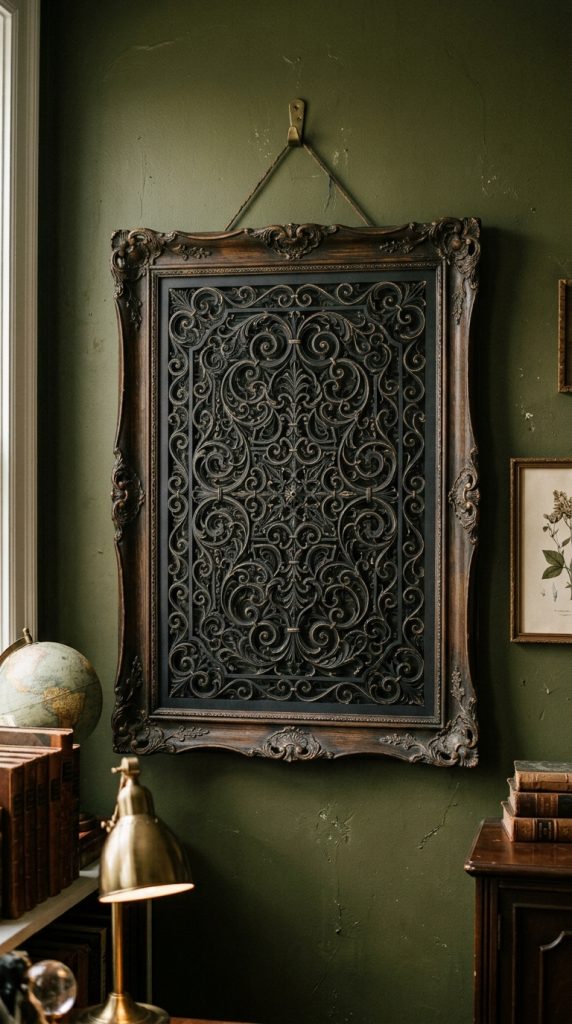
If your aesthetic leans more vintage, gothic, or Parisian chic, you can use cardboard tubes to mimic expensive wrought iron or delicate filigree work. When painted with a matte black or metallic antique bronze finish, cardboard loses all its cheap characteristics and takes on a heavy, metallic illusion.
How to Achieve the Pinterest Look:
- The Cut: Cut the rolls open vertically to create flat sheets of cardboard. Cut these sheets into thin, uniform strips (about 1/4-inch wide).
- The Assembly: Use a pencil or a dowel to tightly roll the strips into elegant scrolls, S-shapes, and spirals. Glue these intricate scrolls inside an empty, ornate thrifted frame to look like an antique architectural grate.
- The Finish: Coat the entire piece in a ultra-matte black spray paint. Once dry, lightly dust the edges with a metallic gold or bronze wax paste using your finger to give it an aged, oxidized patina.
3. Nordic-Inspired Pressed Flower Lanterns
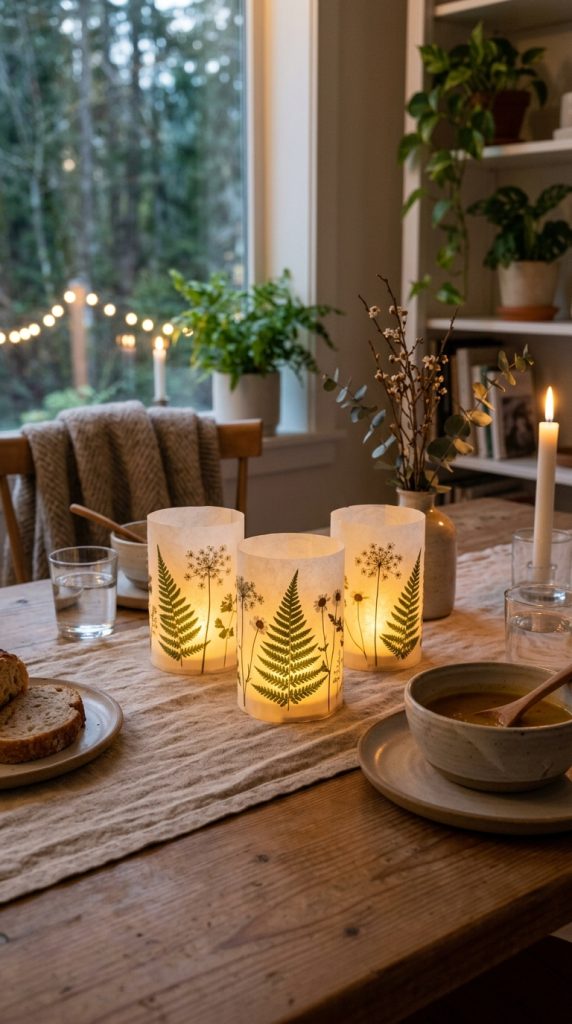
Bring the warmth of Scandinavian hygge into your space with delicate, glowing tabletop lanterns. By combining the sturdy structure of the cardboard tube with translucent parchment paper and real dried botanicals, you create a gorgeous contrast between raw texture and delicate light.
- The Cut: Cut large “windows” or geometric arches out of the sides of your toilet paper rolls, leaving just a thin, sturdy frame at the top, bottom, and corners.
- The Assembly: Roll a piece of translucent baking parchment or vellum paper to fit inside the tube. Before gluing it down, press small, dried ferns, baby’s breath, or clover leaves onto the parchment using a tiny bit of clear craft glue.
- The Finish: Wrap the exterior cardboard frame in raw twine or paint it a soft, muted sage green. Place a warm-toned, flickering LED tea light inside (never use real candles for this craft!) for a soft, ethereal glow.
4. Modern Boho Napkin Rings
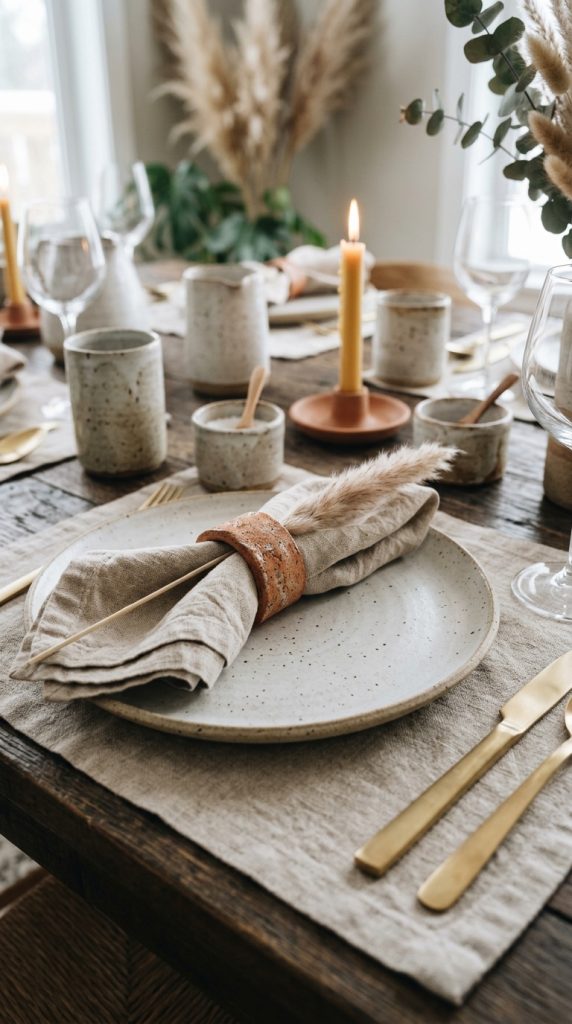
Hosting a dinner party doesn’t mean you need to spend a fortune on tablescapes. You can create a set of stunning, organic modern napkin rings that complement linen napkins and stoneware plates flawlessly.
- The Cut: Cut each toilet paper roll into thirds to create thick, substantial rings.
- The Assembly: You have two aesthetic options here:
- The Raffia Wrap: Tightly wrap the ring in natural raffia or jute twine, securing the ends with hot glue. Glue a single dried bunny tail grass or a mini pampas stem to the top.
- The Plaster Texture: Coat the raw cardboard ring in lightweight spackle, letting your fingers leave organic ridges.
- The Finish: For the spackled rings, paint them in earthy tones like ochre, olive, or charcoal, and seal them with a matte varnish. They look incredibly heavy and artisanal.
5. Faux-Bamboo Mid-Century Organizers
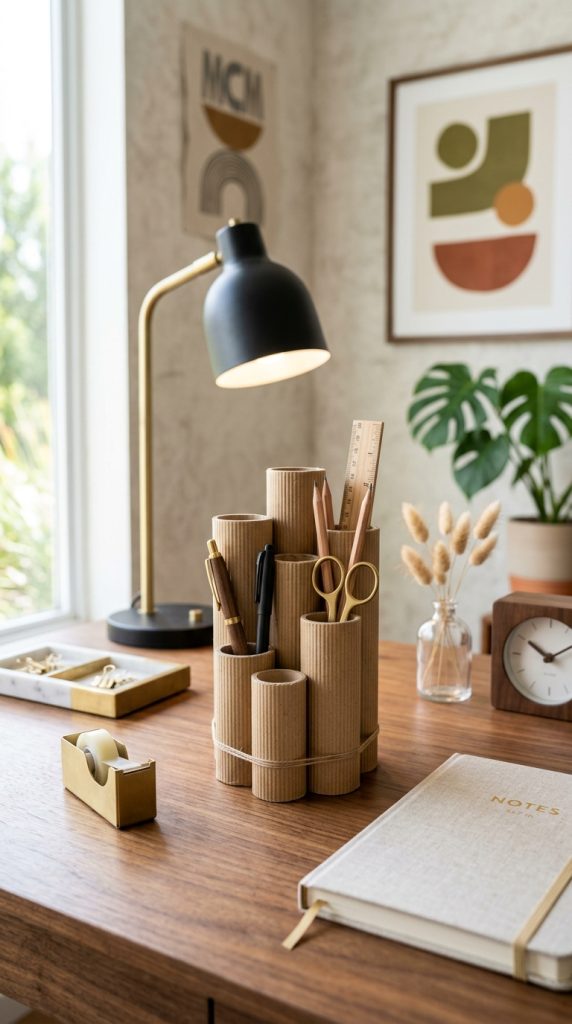
Desk clutter is the ultimate enemy of a clean aesthetic. You can turn a cluster of cardboard tubes into a sleek, mid-century modern desk organizer that looks like genuine bamboo or structured wood turned art.
- The Cut: Gather 5 to 7 tubes and cut them at varying, staggered heights and slight diagonal angles. This creates visual weight and dynamic movement.
- The Assembly: Wrap each tube in heavy-weight, textured linen paper or ribbed kraft paper to mimic the natural ridges of bamboo. Glue the tubes together in a tight, sculptural cluster.
- The Finish: Mount the entire cluster onto a thick, circular piece of wood or heavy cardboard painted to match. Keep the color palette uniform—either all natural kraft brown, pristine stark white, or a deep, moody forest green.
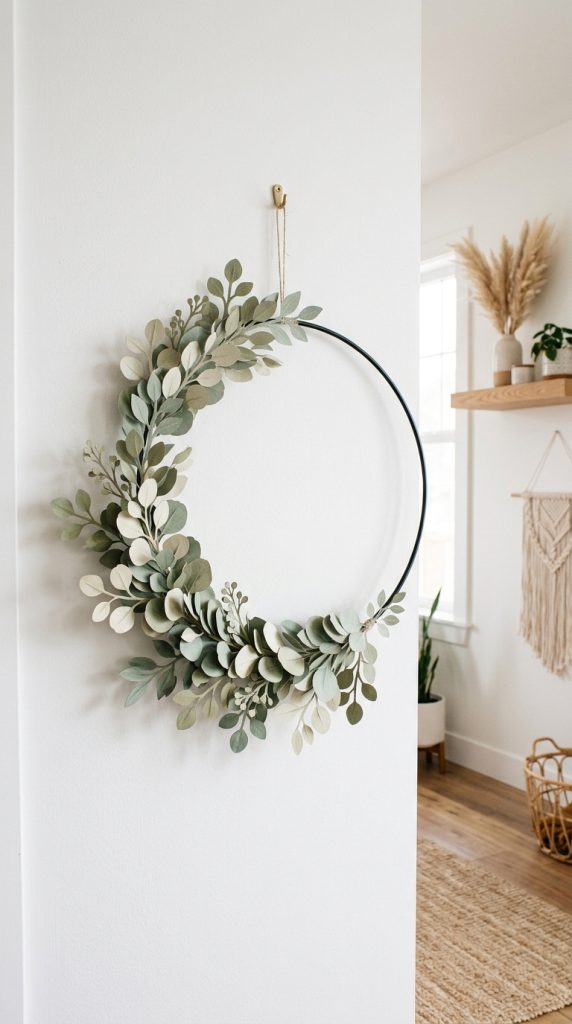
6. Delicate Paper-Cut Eucalyptus Wreath
Biophilic design is incredibly popular on Pinterest, but high-quality faux greenery can be pricey. By transforming toilet paper rolls into delicate eucalyptus leaves, you can create a minimalist wreath that stays green all year round.
How to Achieve the Pinterest Look:
- The Cut: Cut the tubes open completely. Flatten them out under a heavy book for an hour. Cut out coin-shaped and teardrop-shaped eucalyptus leaves in varying sizes.
- The Assembly: Use a thin wire or a delicate metal embroidery hoop as your base. Use hot glue to attach the paper leaves along a thin floral wire stem, overlapping them gently just like real dollar-eucalyptus branches. Wrap the wire around the hoop, leaving a lot of negative space for that modern, asymmetrical look.
- The Finish: Paint the leaves using a gradient of muted, chalky greens—mixing sage, dusty olive, and a hint of grey. Spray with a matte sealant to eliminate any sheen.
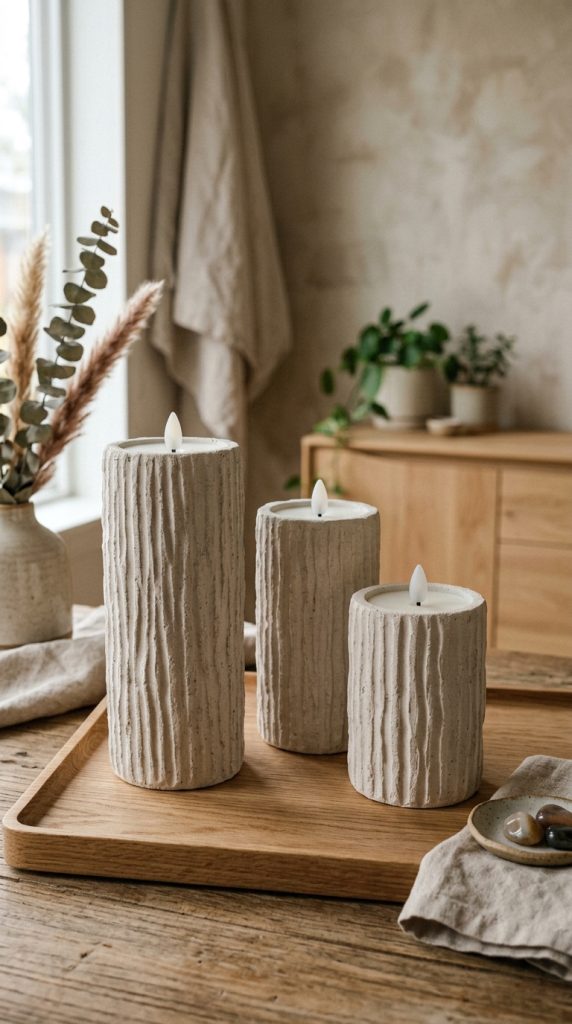
7. Organic Textured Pillar Candle Sleeves
While you shouldn’t put cardboard over an open flame, these sleeves are designed to fit perfectly over cheap, battery-operated LED pillar candles, instantly transforming them into high-end, textured sculptural statement pieces.
- The Cut: Leave the tubes at their full height, or glue two together for a taller pillar.
- The Assembly: Coat the exterior of the tube generously with joint compound or lightweight wall spackle. Use a fork, a coarse comb, or your fingers to drag vertical lines down the surface, creating a ribbed, column-like texture reminiscent of Grecian architecture.
- The Finish: Once completely dry, sand away any harsh flakes. Paint the pillars in a soft limestone or travertine stone-textured paint. Slide them over your LED pillars and cluster them on a coffee table tray.
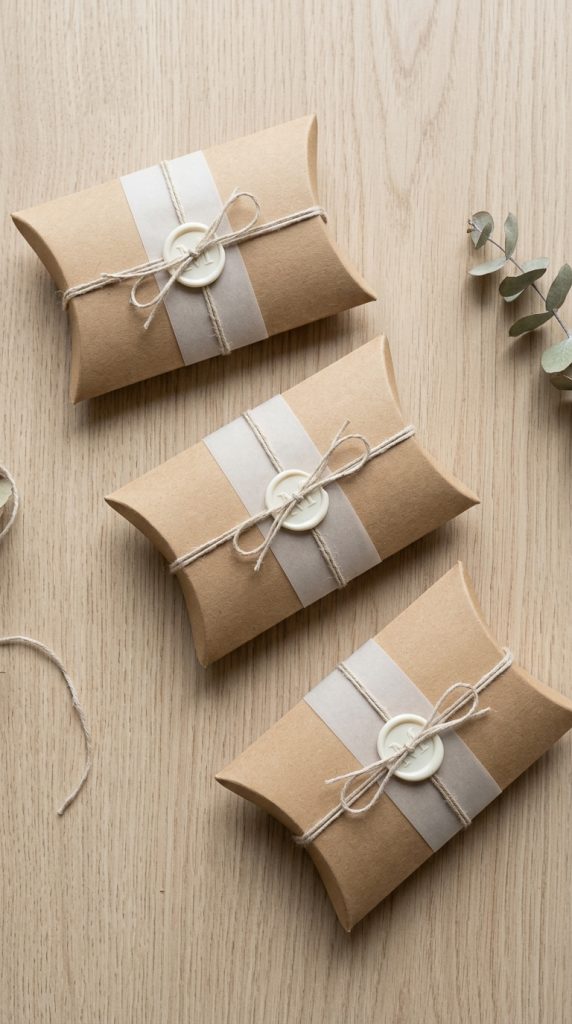
8. Minimalist Geometric Gift Boxes
Small gifts, jewelry, or party favors look incredibly chic when presented in pillow boxes. Toilet paper rolls have the perfect natural curve to create these elegant, geometric packages without needing any glue for closure.
- The Cut: Flatten the tube completely to crease the sides.
- The Assembly: Fold the open ends inward, pressing down to create a clean, crescent-shaped flap on both sides. The natural tension of the cardboard will keep the box closed.
- The Finish: Instead of leaving them plain, wrap the center of the box with a strip of translucent vellum paper. Secure it with a single strand of raw linen thread and seal it with a real wax stamp in a neutral cream or champagne gold color.
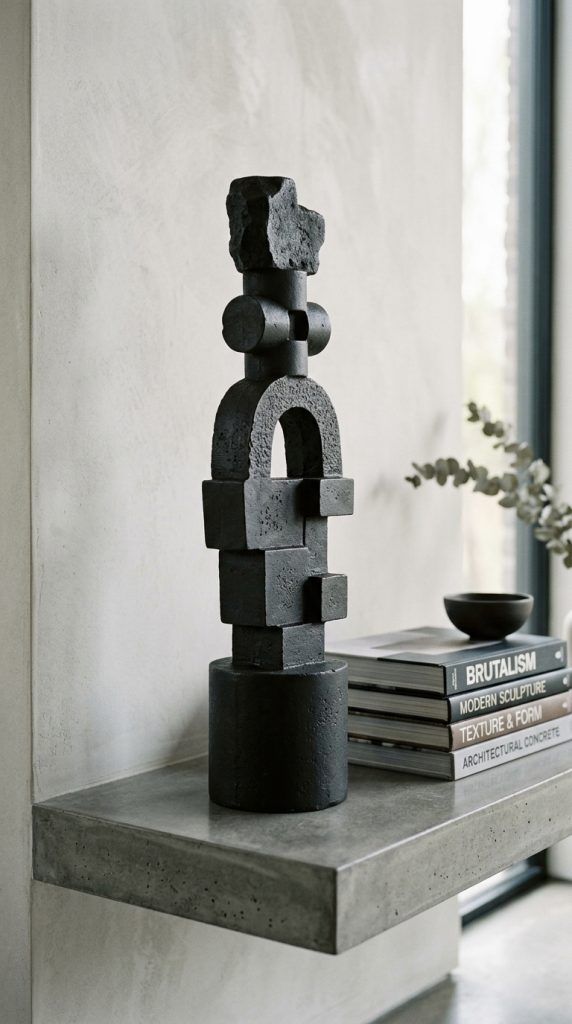
9. Abstract Totem Table Sculptures
Abstract, chunky wooden shapes and totems are staple decor elements in Japandi and brutalist interiors. You can mimic these expensive wooden sculptures by cutting, stacking, and painting cardboard tubes into geometric art pieces.
- The Cut: Cut tubes into sections of various lengths. Cut some with straight edges, some with dramatic angles, and slice a few down the middle to create semi-circles or arches.
- The Assembly: Stack the shapes vertically on top of one another, mixing cylinders, arches, and spheres (you can use crumpled paper mache balls for the spherical elements) to build a balanced, abstract totem. Hot glue the pieces securely.
- The Finish: Coat the entire sculpture in a thick layer of matte gesso or chalk paint. Choose a deep, matte charcoal black, an earthy terracotta, or a sandy beige to give it the appearance of cast concrete, carved stone, or stained wood.
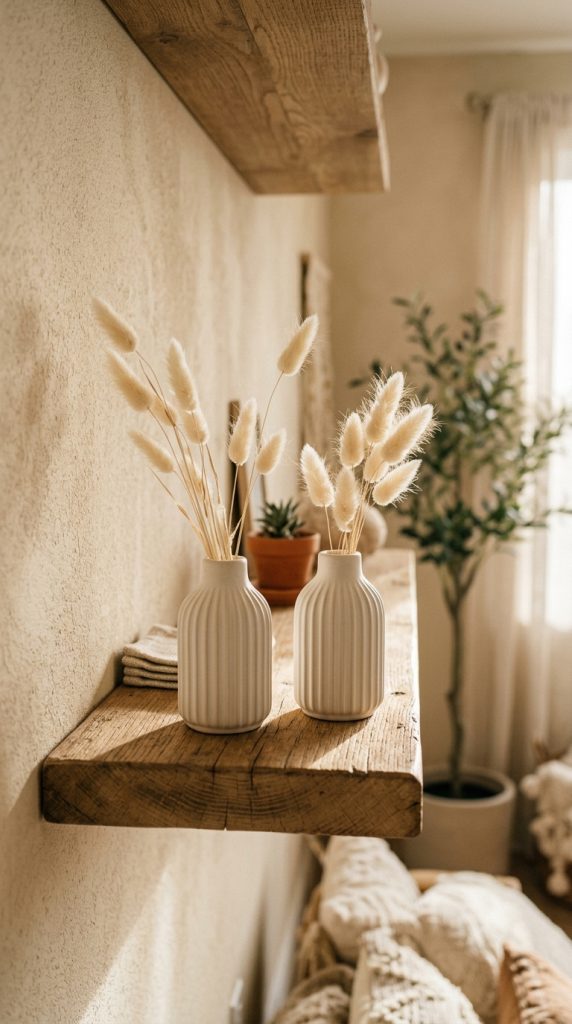
10. Ribbed Faux-Ceramic Mini Bud Vases
Perfect for displaying dried bunny tails, dried lavender, or faux pampas grass stems, these mini bud vases look completely ceramic and effortlessly stylish when styled on a floating shelf or a bedside table.
- The Cut: Leave the tube whole. Cut a circular base out of scraps of cardboard and glue it securely to the bottom of the tube to seal it shut.
- The Assembly: To get that trendy ribbed or fluted ceramic look, glue a series of wooden coffee stir sticks or thin dowels vertically all the way around the tube. Alternatively, wrap thick cotton piping cord around the tube from bottom to top.
- The Finish: Coat the finished structure in a thick matte cream paint mixed with baking powder to hide the seams of the wood or rope. The result is a highly tactile, gorgeous, fluted mini vase.
Creative Design & Styling Tips
To ensure your upcycled crafts never look like a school project, follow these core aesthetic styling rules:
1. Master the Textured Paint
Raw cardboard absorbs moisture easily. Always prime your pieces with a matte gesso or a flat white primer before applying your final coat. To get that coveted Pinterest stone/ceramic look, your holy grail ingredient is baking soda or spackle. It adds instantaneous weight and visual texture.
2. Stick to an Organic Color Palette
When in doubt, look to nature. Stay away from primary or bright neon colors. Instead, curate your palette around:
- Neutrals: Oatmeal, cream, soft ivory, and warm beige.
- Earth Tones: Terracotta, muted ochre, sienna, and burnt umber.
- Muted Botanicals: Sage green, dusty olive, and slate grey.
- Deep Contrast: Ultra-matte charcoal or rich espresso brown.
3. Pair with High-Quality Materials
The secret to high-end upcycling is juxtaposition. Pair your cardboard creations with materials that feel expensive: raw linen fabrics, genuine dried florals, real wood bases, metallic gold leaf accents, and sleek glass elements