There is an archival magic in capturing the exact size of a child’s hand at a specific moment in time. Children grow with an astonishing, quiet speed, and while photographs capture their likeness, handprint crafts capture their physical scale.
Historically, handprint art has been relegated to chaotic finger-painting sessions that yield messy, easily damaged paper keepsakes. However, by introducing premium mediums—such as air-dry clay, organic linen canvases, sophisticated earth-toned mineral paints, and elegant wood-staining techniques—handprint crafts can be elevated into gorgeous, gallery-worthy home accents. These pieces do not just preserve a memory; they actively complement a beautifully designed, modern home interior.
Whether you are a parent looking to document your child’s growth milestones, a teacher planning a high-end classroom art project, or a family member seeking a sentimental gift, this comprehensive guide explores ten sophisticated handprint craft ideas. Complete with step-by-step blueprints, material suggestions, and styling advice, these concepts are designed to look polished, intentional, and entirely professional.
Elevating the Medium: Tools and Techniques for Gallery-Quality Keepsakes
To move past the classic “tempera paint on construction paper” aesthetic, elevating your raw materials is essential. To ensure your finished handprint crafts look elegant enough to frame and display in a prominent living space, consider utilizing these high-quality alternatives:
- Mineral and Matte Chalk Paints: Replace bright, glossy primary-colored school paints with muted, organic tones. Sage green, dusty terracotta, soft charcoal, slate blue, and warm cream look incredibly beautiful and blend seamlessly into modern home decor.
- Archival Linen and Watercolor Paper: Instead of thin construction paper or basic poster board, apply handprints to heavy-duty, cold-pressed watercolor paper (300 GSM) or stretched raw linen canvases. The rich, textured surfaces instantly elevate the art.
- Air-Dry Clay and Porcelain Clay: For three-dimensional impressions, high-quality white air-dry clay or oven-bake polymer clay provides a smooth, porcelain-like finish that resists cracking and holds fine-line hand details beautifully.
- Protective Varnishes: A coat of matte clear acrylic sealer or liquid wax protects the paint and clay from dust, moisture, and yellowing over time, ensuring your keepsake remains pristine for decades.
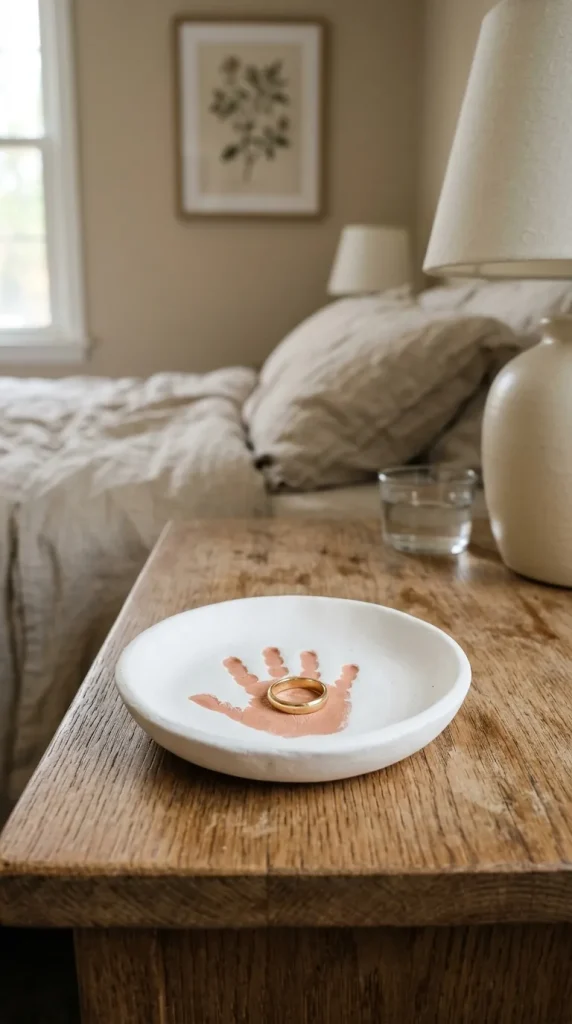
1. The Earth-Toned Clay Handprint Ring Dish
A beautiful, functional addition to any dresser or entryway console, this shallow clay dish features a gently pressed handprint in the center. It serves as a sweet, tactile tray for holding jewelry, keys, or daily trinkets.
Aesthetic Blueprint
- Material: Premium white air-dry clay, fine-grit sandpaper, and matte acrylic paint.
- Color Palette: Sand, terracotta, sage, or soft ivory.
- Vibe: Minimalist, organic, and functional.
Step-by-Step Guide
- Roll the Clay: Knead a palm-sized portion of white air-dry clay until smooth. Roll it out on a sheet of parchment paper to a uniform thickness of about $1/4$ inch.
- Make the Impression: Have your child press their hand firmly into the center of the clay. Apply gentle, even pressure to each finger and the palm to ensure a clear, deep print.
- Cut the Dish Shape: Place a wide bowl or a large circular cookie cutter over the handprint, centering it. Cut out the circle using a clay knife.
- Curve the Edges: Gently lift the clay circle and place it inside a shallow kitchen bowl lined with plastic wrap. Press it down softly so the edges curve upward to form a dish shape. Let it dry completely for 24 to 48 hours.
- Sand and Paint: Once dry, sand the edges smooth with fine sandpaper. Paint the interior of the handprint impression with a soft terracotta mineral paint, leaving the rest of the dish a clean, matte white. Seal with a matte varnish.
Styling Tip
Place this dish on a wooden nightstand alongside a small ceramic vase of dried bunny tails to create a serene, curated bedside aesthetic.
2. The Minimalist Family Handprint Layered Canvas
This project documents the physical connection of the entire family. By layering handprints from the largest (parents) to the smallest (children) on a single canvas in coordinating, muted tones, you create a striking piece of modern abstract art.
Aesthetic Blueprint
- Material: Stretched raw canvas (12×16 or 16×20 inches) and matte acrylic paint.
- Color Palette: A cohesive gradient, such as warm beige, taupe, soft clay, and deep espresso.
- Vibe: Abstract, familial, and high-contrast.
Step-by-Step Guide
- Prepare the Canvas: Leave your canvas raw and unpainted, or apply a solid, light cream background coat of matte chalk paint. Let it dry completely.
- Apply the First Layer: Coat the palm of the family member with the largest hand (e.g., Parent A) with a thin, even layer of the darkest paint color (such as espresso). Press the hand firmly near the bottom-center of the canvas.
- Layer Sequentially: Once the first print is dry, coat the hand of Parent B with a slightly lighter shade (e.g., warm clay). Press their hand directly over Parent A’s print, offsetting it slightly upward or to the side so both outlines are visible.
- Add the Children’s Prints: Repeat this process with each child’s hand, moving from oldest to youngest, using progressively lighter shades of paint (e.g., taupe, then beige).
- Finish with Initials: Neatly handwrite the year or the family name in a tiny, minimalist font at the very bottom corner of the canvas using a fine-tipped archive pen.
Styling Tip
Hang this beautiful canvas in a slim, light-oak floating frame in your living room gallery wall to ground the display with organic texture and personal history.

3. The Botanical Monstera Leaf Handprint Art
For parents who love house plants and bohemian design, this clever craft transforms a basic handprint into a stylish, botanical monstera leaf illustration that fits perfectly into a modern plant-filled room.
Aesthetic Blueprint
- Material: Heavyweight cold-pressed watercolor paper and high-quality sage green paint.
- Color Palette: Forest green, sage, moss, and warm ivory.
- Vibe: Botanical, fresh, and artistic.
Step-by-Step Guide
- Set Up the Paper: Place a sheet of thick, textured watercolor paper on your workspace.
- Paint the Hand: Apply a rich, opaque layer of sage green paint to your child’s hand. Ensure the fingers are spread wide.
- Stamp the Leaf: Press the hand down firmly in the center of the paper. Gently press each finger to ensure a solid print. This print forms the base shape of the monstera leaf.
- Add the Monstera Details: Once the print is dry, use a fine-tipped paintbrush and forest green paint to draw a thin leaf stem extending from the bottom of the palm. Carefully paint small, organic leaf cutouts (fenestrations) inside the finger spaces to mimic the iconic monstera look.
- Frame the Art: Place the finished dry painting inside a natural wood frame with a wide white mat board to give it an upscale gallery appearance.
Styling Tip
Hang this botanical piece in a nursery or home office alongside hanging macramé planters and brass wall sconces.

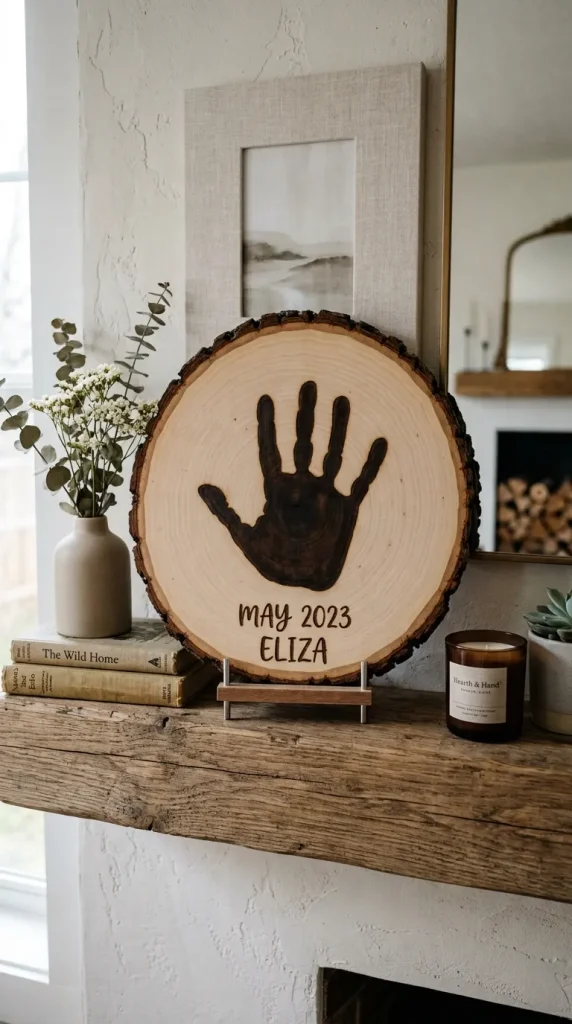
4. The Heirloom Wooden Silhouette Handprint Plaque
Wood burning and staining add a highly professional, rustic-modern finish to any craft. This plaque features a clean, burned-wood silhouette of a child’s hand on a beautiful slice of natural wood.
Aesthetic Blueprint
- Material: A natural basswood slice with bark intact, carbon transfer paper, pencil, and a wood-burning pen (pyrography tool).
- Color Palette: Natural birchwood, deep charred brown, and clear satin varnish.
- Vibe: Rustic, warm, and archival.
Step-by-Step Guide
- Trace the Hand: Have your child place their hand flat on a plain sheet of paper. Carefully trace the outline of their hand with a sharp pencil.
- Transfer the Image: Place a sheet of carbon transfer paper over your sanded basswood slice. Position the traced paper handprint on top and trace over the lines firmly with a pencil to transfer the outline directly onto the wood grain.
- Burn the Silhouette: Using a wood-burning tool equipped with a fine-point tip, carefully burn along the transferred outline. Once the border is complete, switch to a shading tip to fill in the entire hand silhouette with a deep, textured charred-brown finish.
- Seal and Protect: Clean away any stray pencil marks with an eraser. Apply a thin, protective layer of clear satin varnish or furniture wax to bring out the natural grain of the wood and protect the burned design.
Styling Tip
This natural wood plaque looks beautiful styled on a wooden kitchen hutch, a cozy bookshelf, or a rustic fireplace mantel surrounded by brass candlesticks.
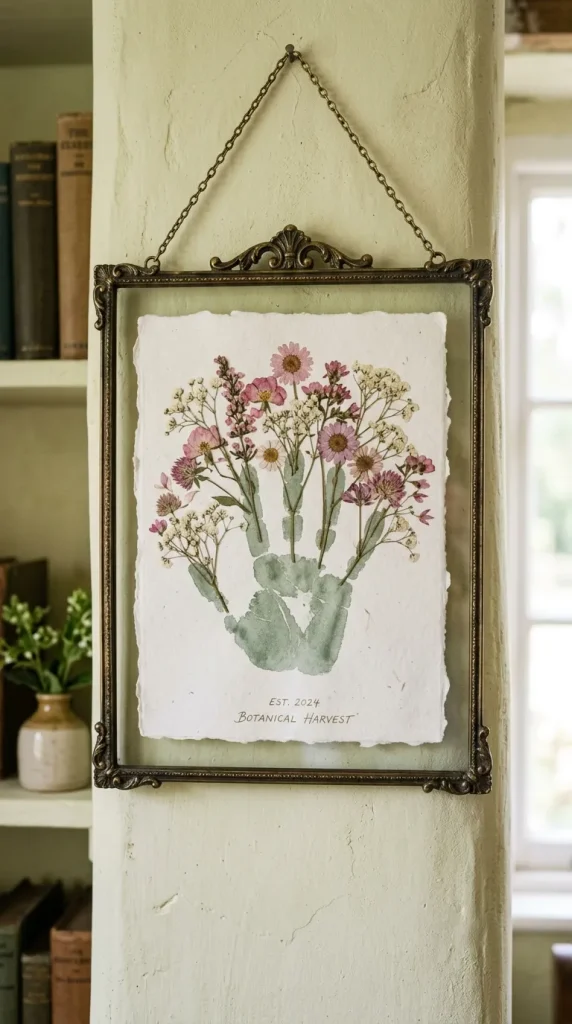
5. The Sweet Botanical Handprint Herbarium
Inspired by traditional French flower presses, this craft combines a handprint painted to look like delicate flower stems, topped with real pressed botanical elements for an elegant, mixed-media masterpiece.
Aesthetic Blueprint
- Material: Pressed wild fern leaves, dried baby’s breath, watercolor paper, and soft green paint.
- Color Palette: Fern green, dusty pink, ivory, and soft linen.
- Vibe: Vintage, delicate, and botanical.
Step-by-Step Guide
- Print the Stems: Paint your child’s hand and fingers in a soft, dusty sage green. Press the hand down near the bottom edge of the watercolor paper. The palm represents the base of the plant, while the five extended fingers represent flower stems reaching upward.
- Press the Real Florals: Collect small wildflowers, clover, or baby’s breath from your garden and press them inside a heavy book for a few days until completely flat and dry.
- Adhere the Flowers: Using a tiny drop of clear craft glue, attach the real pressed flowers directly to the tips of the printed finger stems.
- Label the Specimen: In the style of a classic botanical specimen card, write your child’s name, age, and the date in small cursive handwriting at the bottom right corner.
- Frame with Glass: Place the piece inside a double-sided floating glass frame to let the organic textures shine.
Styling Tip
Display this framed floating specimen in a sunlit hallway or breakfast nook, where the light can filter through the delicate pressed flowers.
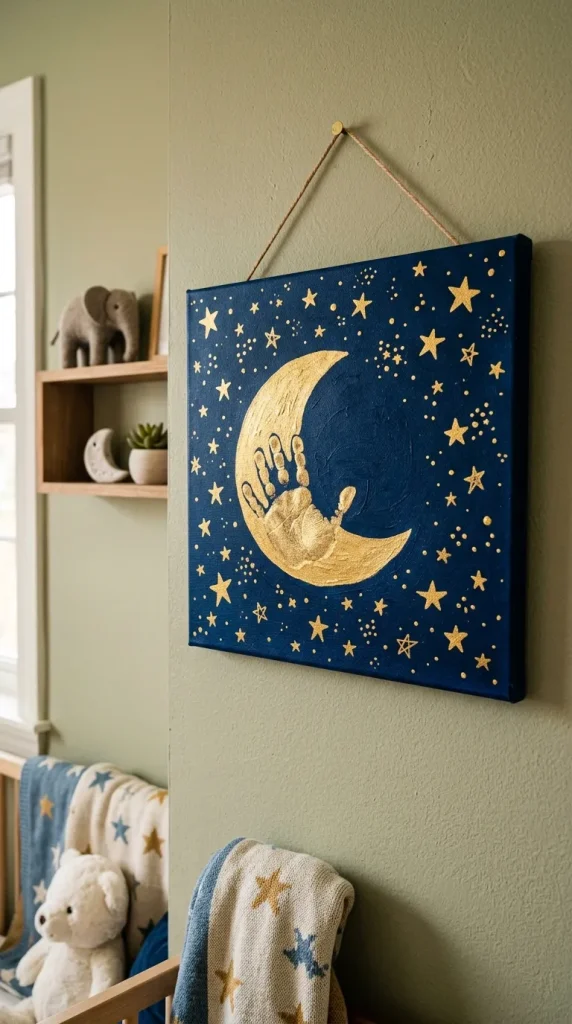
6. The Celestial Starry Night Handprint Canvas
Perfect for a child’s bedroom, this cosmic-themed canvas transforms two overlapping handprints into a elegant, stylized crescent moon and twinkling stars, capturing a sense of dreamy wonder.
Aesthetic Blueprint
- Material: Stretched canvas, deep indigo acrylic paint, gold paint, and a fine gold paint pen.
- Color Palette: Midnight blue, metallic gold, and soft white.
- Vibe: Whimsical, celestial, and modern.
Step-by-Step Guide
- Create the Night Sky: Paint your entire canvas in a deep, textured midnight blue or indigo. Use a sponge to lightly dab a hint of white and purple paint across the center to create a subtle galaxy nebula effect. Let it dry.
- The Moon Print: Paint your child’s hand in a bright, shimmering metallic gold. Have them press their hand onto the canvas, curving their palm slightly to mimic the crescent of a moon.
- Draw the Stars: Using a fine-point gold paint pen, draw delicate, minimalist four-point stars and tiny dots throughout the empty space around the handprint moon.
- Add a Quote: Optionally, use the gold pen to write a sweet, minimalist phrase like “To the moon and back” or simply the child’s name and birth year in clean block lettering along the lower edge of the canvas.
Styling Tip
Hang this painting directly above a crib or a toddler’s bed, matching it with gold celestial wall decals or a brass star mobile.
7. The Framed Linen Handprint Silhouette Embroidery
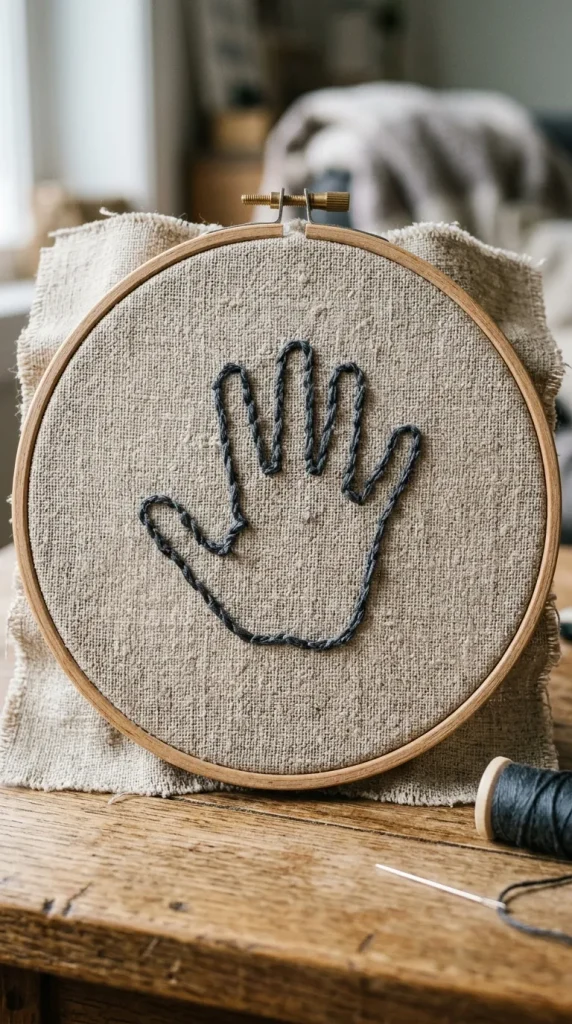
A beautiful combination of textile art and modern portraiture. This project uses a handprint outline as an embroidery template, resulting in a textured linen piece that looks highly sophisticated and artisanal.
Aesthetic Blueprint
- Material: Raw linen fabric, a 6-inch wooden embroidery hoop, embroidery floss, and a needle.
- Color Palette: Oatmeal linen, charcoal grey, mustard yellow, or terracotta thread.
- Vibe: Cozy, artisanal, and timeless.
Step-by-Step Guide
- Trace the Hand on Fabric: Place your raw linen fabric inside the wooden embroidery hoop, pulling it taut. Place your child’s hand flat on the fabric and trace the outline lightly with a water-soluble fabric marker.
- Thread the Needle: Choose a high-quality cotton embroidery floss in a contrasting modern shade like charcoal or terracotta. Thread your needle, tying a knot at the end.
- Stitch the Outline: Using a simple, elegant backstitch, stitch carefully along the traced lines of the handprint. Keep your stitches small and uniform to ensure the curves of the fingertips look clean and rounded.
- Incorporate the Date: Stitch the year or your child’s initials inside the palm of the handprint outline in a simple running stitch.
- Finish the Back: Trim any excess fabric from the back of the hoop and glue the edges down securely. Hang the piece directly by its wooden hoop.
Styling Tip
Group three or four embroidery hoops of different sizes (representing different years or siblings) on a cozy gallery wall for a beautiful, textured family timeline.
8. The Minimalist Geometric Handprint Poster
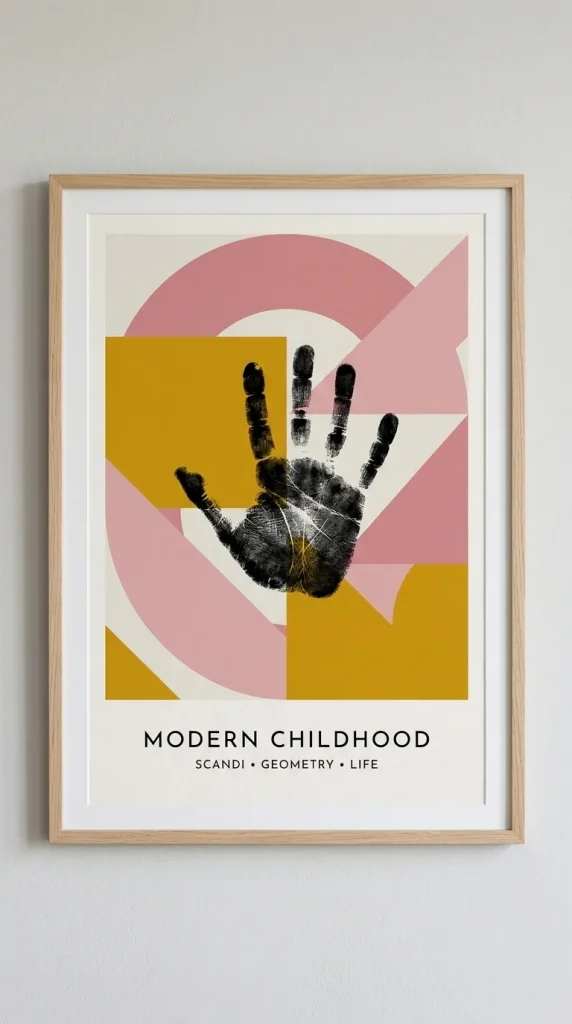
For homes designed with ultra-clean, Scandi-modern, or mid-century aesthetics, this poster uses geometric color blocking to turn a handprint into a bold, stylish piece of graphic art.
Aesthetic Blueprint
- Material: Heavy-duty white poster board, painter’s tape, matte acrylic paints, and a black marker.
- Color Palette: Mustard yellow, dusty pink, charcoal, and warm cream.
- Vibe: Mid-century modern, graphic, and bold.
Step-by-Step Guide
- Create the Color Blocks: Using painter’s tape, divide your white poster board into two or three large geometric sections (such as a large circle, a diagonal stripe, and a half-arch).
- Paint the Blocks: Paint each section in a different contrasting mid-century modern matte shade (e.g., one dusty pink arch, one mustard yellow circle). Let the paint dry completely, then peel off the tape to reveal crisp, clean white dividing lines.
- Stamp the Handprint: Paint your child’s hand in a bold, contrasting charcoal grey or stark black paint. Press the hand directly over the center intersection of the colorful geometric blocks.
- Add Minimalist Lines: Use a fine black marker to draw a clean, thin geometric circle or line around the handprint, framing it within the graphic composition.
Styling Tip
Slide this poster into a sleek, black metal frame and lean it casually on a floating shelf alongside wooden toys and modern design books.
9. The Organic Cotton Handprint Canvas Tote
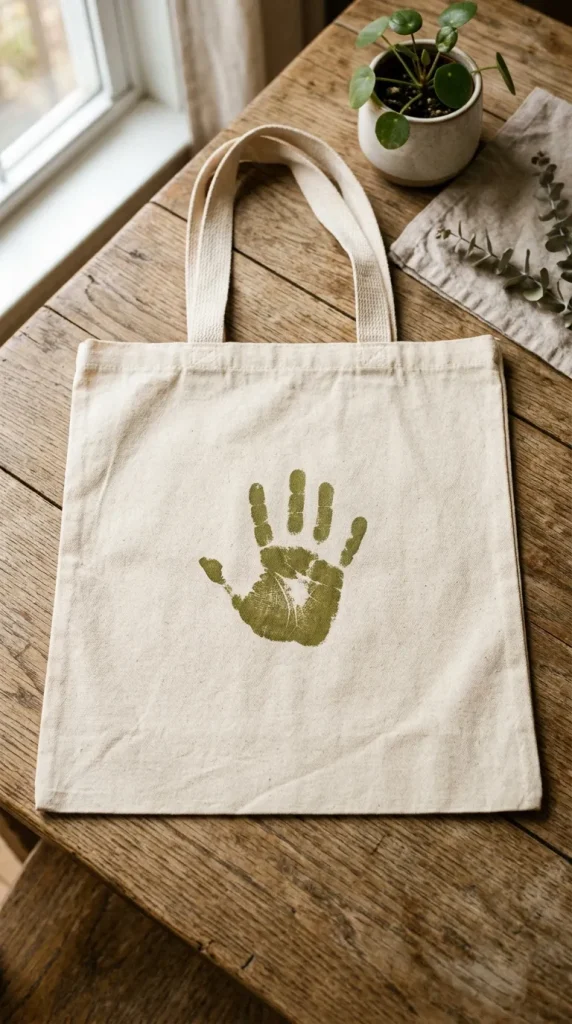
This functional craft transforms a basic canvas utility tote into a beautiful, personalized accessory that parents, grandparents, or teachers can proudly carry every day.
Aesthetic Blueprint
- Material: A heavy-duty, unbleached organic cotton canvas tote bag, fabric medium, and fabric paint.
- Color Palette: Olive green, warm tan, navy blue, and natural cotton.
- Vibe: Organic, practical, and eco-friendly.
Step-by-Step Guide
- Prep the Tote: Place a thick piece of cardboard inside the tote bag to prevent any paint from bleeding through to the opposite side.
- Mix the Paint: Mix your chosen fabric paint with a fabric medium according to the bottle instructions. This ensures the handprint remains soft, flexible, and fully washable without cracking.
- Stamp the Handprint: Paint your child’s hand in a rich, earthy color like olive green. Press the hand firmly onto the center of the canvas tote, holding it down for a few seconds to let the woven fibers absorb the paint.
- Heat Set the Paint: Once the paint is completely dry, remove the cardboard. Heat set the handprint by running a warm clothes iron over the back of the fabric for 2 to 3 minutes.
Styling Tip
Use this personalized tote bag as a beautiful, reusable gift bag for Mother’s Day, Father’s Day, or a teacher’s retirement, filling it with gourmet treats and fresh flowers.
10. The Elegant Porcelain Plaster Handprint Casting
For the ultimate, highly tactile three-dimensional keepsake, plaster casting captures the exact, delicate contours, folds, and microscopic lines of a child’s hand, looking like a piece of classical sculpture.
Aesthetic Blueprint
- Material: Alginate molding powder, plaster of Paris, water, and a wooden display block.
- Color Palette: Pure plaster white and natural oak.
- Vibe: Sculptural, classic, and high-end.
Design Execution
Mix the Alginate powder with warm water in a deep plastic container. Have your child submerge their hand into the gel, holding it completely still for about 3 to 5 minutes until the gel sets into a firm, rubbery consistency. Gently wiggle the hand out.
Mix the plaster of Paris and pour it slowly into the empty hand mold, tapping the sides to release any trapped air bubbles. Let it harden, then peel away the Alginate mold to reveal an incredibly detailed, perfect 3D sculpture of your child’s hand.
Styling Tip
Mount the finished plaster hand sculpture onto a polished oak block and place a glass bell jar dome over it, styling it like a precious museum artifact on your entryway table.