Scrapbook paper is one of the most versatile mediums in the papercrafting world. Available in endless patterns, rich weights, double-sided textures, and metallic foils, these decorative sheets offer far more potential than simply filling memory photo albums. With precise folds, clean cutting techniques, quality adhesives, and intentional styling, basic pattern sheets transform into elevated home accents, handmade stationery, and bespoke event decor.
To ensure paper crafts look like high-end boutique designs rather than quick school projects, the focus must remain on precision technique, structural integrity, cohesive color stories, and high-quality finishing touches.
Here is a design, technical, and step-by-step crafting guide to 10 scrapbook paper craft ideas, complete with paper weight science, adhesive selection, structural workflows, and presentation guidelines.
Technical Fundamentals, Paper Weight Science & Adhesive Selection
Mastering paper weight mechanics, creasing techniques, and adhesive bonding is crucial to achieving crisp lines and long-lasting structural crafts.
          [ Step 1: Paper Weight Selection (Text vs. Cover Stock) ]
                                     │
          [ Step 2: Scoring & Precision Folding Mechanics ]
                                     │
          [ Step 3: Bonding with Specialty Paper Adhesives ]
                                     │
          [ Step 4: Sealing, Edge Inking & Modular Assembly ]
1. Paper Weight Metrics & Fiber Grain
- Patterned Paper (60 lb – 80 lb Text Weight): Lightweight and easy to fold or wrap. Ideal for delicate origami, paper beads, envelope liners, and decoupage.
- Patterned Cardstock (65 lb – 110 lb Cover Stock): Heavyweight and rigid. Perfect for structural projects like gift boxes, 3D rosettes, banner pennants, and paper lanterns.
- Paper Grain Direction: Paper tears and folds cleanest parallel to its internal fibers. Scoring against the grain without a scoring tool will cause cracking along patterned surfaces.
2. Adhesive Mechanics & Tools
- Liquid PVA Craft Glue: Dries clear and strong, ideal for heavy cardstock joins. Apply with a fine-tip precision applicator to prevent paper warping or buckling.
- Double-Sided Tape Roller: Provides an instant, dry bond without wrinkle risks, making it ideal for envelope sealing, gift wrapping, and photo mounting.
- Foam Adhesive Dots: Creates dimensional separation between paper layers, casting subtle natural shadows that add depth to paper crafts.

1. Dimensional Layered Paper Shadowbox Art
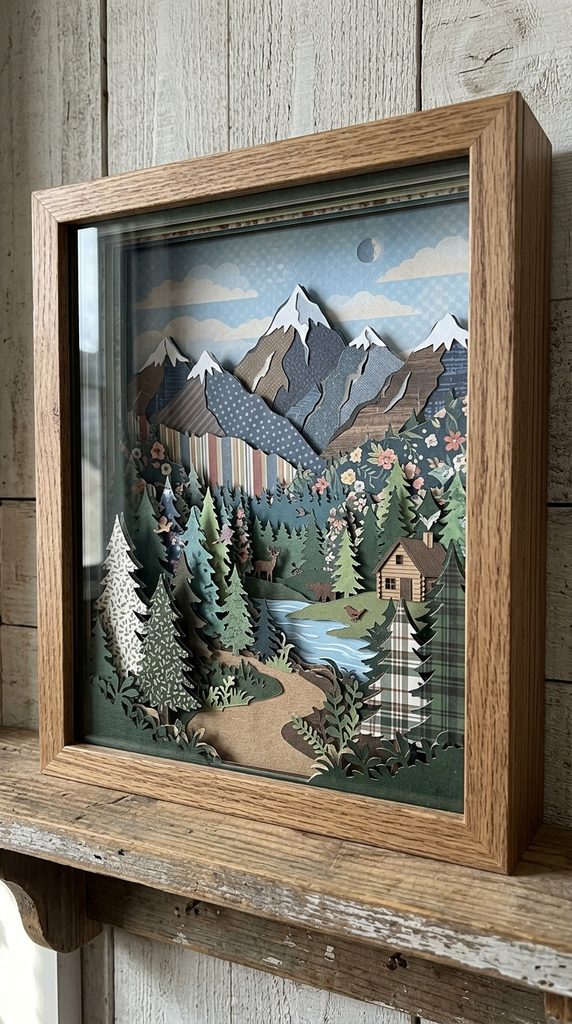
Constructing three-dimensional paper shadowbox art transforms flat patterned cardstock into layered, architectural landscapes or botanical displays.
[ Cut Concentric Cardstock Layers ] ── Apply Foam Spacers ── [ Stack Layers ] ── Frame in Shadowbox
Technical Specs & Assembly Workflow
- Core Materials: 4 to 6 sheets of coordinating patterned cardstock ($80\text{ lb}$ cover stock), foam adhesive tape/dots, a precision hobby knife, self-healing cutting mat, and a deep shadowbox frame.
- Execution Process: Trace or print vector silhouette layers (e.g., forest scenes, geometric mandalas, or mountain ranges) onto the back of each cardstock sheet. Carefully cut out the positive spaces using a sharp hobby knife blade.
- Dimensional Stacking: Apply small strips of $2\text{mm}$ thick foam tape around the back border of each cut layer. Stack the layers sequentially inside the shadowbox frame to create natural shadow depth between scenes.
2. Handmade Accordion Envelope Coupon & Photo Books
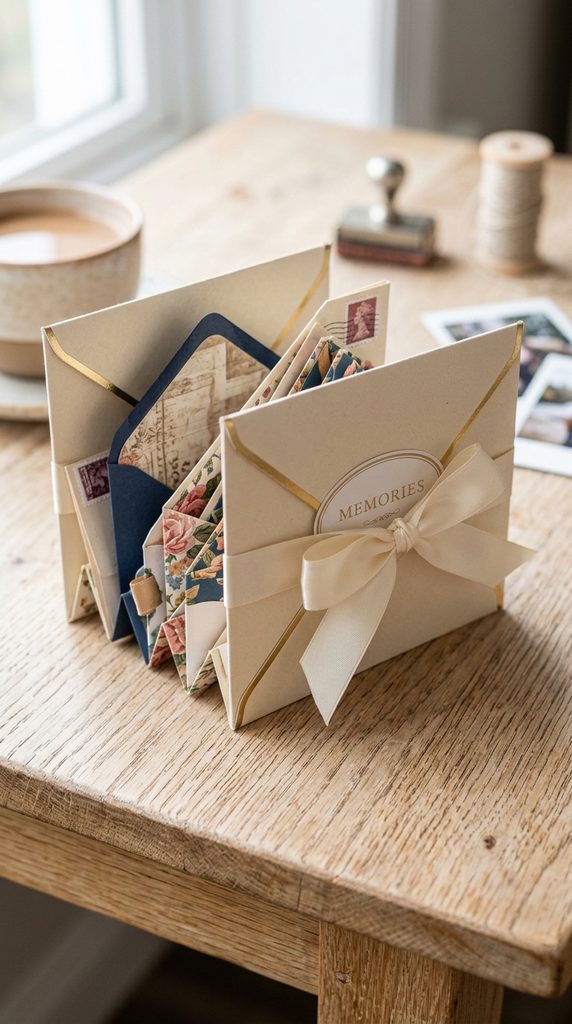
A delightful hybrid of bookbinding and paper crafting, accordion fold books feature built-in pockets made entirely from double-sided patterned paper.
Technical Specs & Assembly Workflow
- Core Materials: Double-sided patterned paper ($12\text{in } \times 12\text{in}$, $80\text{ lb}$ text weight), bone folder, double-sided tape runner, and satin ribbon closure.
- Execution Process: Score a continuous $12\text{-inch}$ paper strip horizontally at $3\text{ inches}$ from the bottom edge to create an upward pocket flap. Score vertically every $4\text{ inches}$ across the length. Fold the vertical lines back and forth in an alternating accordion style.
- Pocket Finishing: Seal the side edges of the bottom fold using fine double-sided tape to form secure pockets. Attach hard chipboard covers wrapped in matching paper to both ends, securing a satin ribbon closure underneath.
3. Sculptural 3D Paper Pinwheels and Rosette Wall Decor
Elevate party backdrops or wall decor using dense, concertina-folded paper rosettes topped with decorative cardstock centers.
Technical Specs & Assembly Workflow
- Core Materials: 3 matching sheets of heavy patterned cardstock ($12\text{in } \times 12\text{in}$), scoring board, bone folder, hot glue gun, and decorative die-cut center circles.
- Execution Process: Place cardstock on a scoring board and score vertical lines every $0.5\text{ inches}$ across the entire sheet. Fold accordion-style along the score lines. Repeat across all three sheets.
- Assembly & Joinery: Accordion-fold all three sheets, fold them in half, and glue their outer edges together using a hot glue gun to form a complete $360\text{-degree}$ circle. Secure a thick cardstock disc to the center front and back with hot glue to hold the fan tension permanently.

4. Custom Lined Patterned Envelopes & Note Cards
Add bespoke flair to personal correspondence by lining solid-colored stationery envelopes with vibrant, patterned scrapbook sheets.
Technical Specs & Assembly Workflow
- Core Materials: Blank solid-color A7 stationery envelopes, lightweight patterned scrapbook paper ($60\text{ lb}$ text weight), cardstock for note cards, an envelope liner template, and dry tape runners.
- Execution Process: Trace an envelope liner template onto the non-patterned side of your paper sheet and cut along the lines. Slip the cut paper liner inside the blank envelope, aligning it just below the envelope’s gummed adhesive line.
- Securing the Liner: Fold the top flap down along the envelope crease using a bone folder. Apply a thin strip of tape runner along the top edge of the liner to secure it seamlessly inside the envelope flap.

5. Architectural Geometric Paper Lanterns and Votives
Cast warm, soft pattern glows across surfaces by wrapping pierced or laser-cut scrapbook paper around glass candle holders.
Technical Specs & Assembly Workflow
- Core Materials: Translucent or lightweight double-sided scrapbook paper, small paper piercer or craft punch, double-sided tape, glass votive holders, and flameless LED tea lights.
- Execution Process: Measure the height and circumference of your glass votive holder. Cut a precise strip of scrapbook paper to match, adding a $0.5\text{-inch}$ overlap allowance. Use a needle piercer or star punch to pierce delicate geometric patterns across the paper.
- Installation: Wrap the paper around the outer glass wall and secure the overlapping edge with double-sided tape. Place an LED flameless tea light inside to project delicate light patterns.

6. Upcycled Decoupage Wooden Trays and Coasters
Transform plain wooden home accessories into vibrant display pieces using decoupage techniques with patterned scrapbook paper.
Technical Specs & Assembly Workflow
- Core Materials: Raw wood valet tray or coaster blanks, patterned paper sheets, decoupage glue and sealer (matte or gloss finish), foam brushes, brayer roller, and fine sandpaper (400 grit).
- Execution Process: Sand the wood surface smooth and wipe away dust. Cut paper sheets to fit the tray base or coaster tops precisely. Coat the wood surface with a uniform layer of decoupage glue using a foam brush.
- Application & Sealing: Place the paper onto the wet glued surface and smooth out air bubbles working from the center outward using a rubber brayer roller. Allow to dry for 2 hours, then apply 3 thin, protective topcoats of decoupage sealer, sanding lightly between coats.

7. Dimensional Origami Paper Bead Jewelry
Transform leftover paper strips into polished, hard-shell beads strung into unique bracelets, necklaces, or tassels.
Technical Specs & Assembly Workflow
- Core Materials: Long triangular strips of patterned scrapbook paper ($0.75\text{in}$ base tapering down to $12\text{in}$ length), thin wooden skewers, clear-drying craft glue, gloss brush-on glaze, and elastic string.
- Execution Process: Apply a thin layer of liquid craft glue along the back of a tapered paper strip, leaving the wide end unglued. Wrap the wide end tightly around a wooden skewer and roll the strip continuously toward the point, keeping it centered.
- Glazing & Curing: Secure the narrow tip with a small dot of glue. Once dry, coat the paper bead with three layers of waterproof clear gloss glaze while still mounted on the skewer. Allow to cure completely before stringing onto elastic cord.

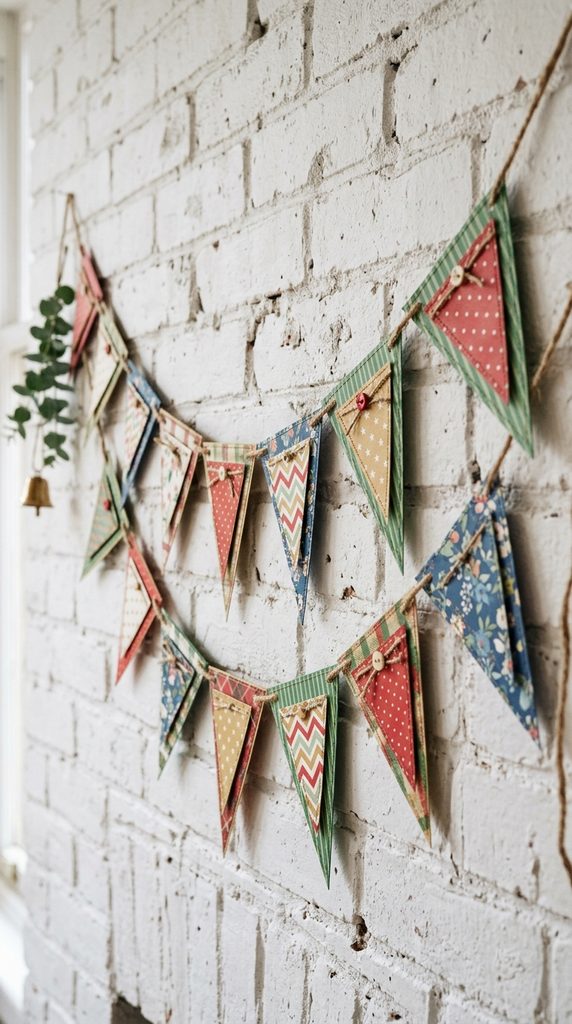
8. Handcrafted Party Bunting and Pennant Banners
Add festive visual texture to celebrations or home nurseries with layered pennant banners cut from coordinating scrapbook paper collections.
Technical Specs & Assembly Workflow
- Core Materials: 5 to 8 coordinating patterned cardstock sheets, triangle pennant template, eyelet setter tool, brass eyelets, twine or satin ribbon, and foam adhesive dots.
- Execution Process: Cut 10 to 15 matching triangular pennants from various patterned cardstock sheets using a template. Cut slightly smaller solid-colored triangles to layer on top using dimensional foam dots.
- Stringing Process: Punch two small holes in the top corners of each pennant using a hole punch and reinforce them with brass eyelets. Thread natural jute twine or satin ribbon through the eyelets, leaving a $1\text{-inch}$ gap between pennants.
9. Intricate Botanical Paper Flower Bouquet
Craft long-lasting floral arrangements by shaping, curling, and assembling flower petals cut from double-sided scrapbook paper.
Technical Specs & Assembly Workflow
- Core Materials: Double-sided floral patterned paper ($65\text{ lb}$ cardstock), floral wire stems, floral tape, hot glue gun, bone folder or pencil for curling, and wire cutters.
- Execution Process: Cut flower petal shapes in graduated sizes (small, medium, large) along with leaf shapes. Run the edge of a bone folder or pencil along the cardstock petals to curl them naturally.
- Flower Construction: Wrap a small petal around the top of a green floral wire stem to form the inner flower bud, securing it with hot glue. Layer larger petals outward in overlapping arrangements. Wrap green floral tape around the base and wire stem to finish.

10. Modular Origami Paper Gift Boxes with Lids
Fold sturdy, self-locking gift boxes and matching lids using two square sheets of heavy patterned cardstock without needing glue or cuts.
Technical Specs & Assembly Workflow
- Core Materials: Two square sheets of patterned cardstock ($12\text{in } \times 12\text{in}$ for box base, $12.25\text{in } \times 12.25\text{in}$ for box lid) and a bone folder for creasing.
- Execution Process: Fold cardstock diagonally both ways to mark the center, then fold all four corners into the center (Blintz fold). Crease all edges sharply using a bone folder.
- Assembly & Structure: Fold outer edges inward, open two opposing corner flaps, and fold side walls upward along pre-creased lines. Tuck the corner flaps over the side walls into the box floor to lock the structure. Repeat with the slightly larger sheet to create a matching lid.