Rustic wall decor brings timeless warmth, natural textures, and a cozy, lived-in feel to any interior space. By pairing raw wooden elements, weathered metals, woven natural fibers, and repurposed architectural salvage, rustic wall art bridges the gap between traditional country charm and modern home aesthetics.
Creating your own rustic wall decor allows complete creative freedom over wood stains, spatial proportions, and material sourcing. Whether you are upcycling weathered barn wood into a statement feature, crafting a woven botanical tapestry, or building floating timber shelves, handmade rustic accents introduce organic character to living rooms, dining spaces, entryways, and bedrooms.
Here is a comprehensive guide to ten rustic DIY wall decor projects, complete with material lists, step-by-step assembly workflows, spatial placement strategies, and protective finishing protocols.
Timber Selection & Aging Techniques Foundations
Before building your DIY projects, mastering material selection and natural wood-aging techniques ensures authentic rustic character:
1. Sourcing Reclaimed Timber
Seek out reclaimed pallet wood, salvaged barn siding, or cedar fencing. Look for boards with visible knots, natural grain variations, and subtle surface imperfections—these details give rustic decor its unique character.
2. Natural Vinegar & Steel Wool Distressing
To age new pine or fir boards naturally:
- Dissolve a pad of fine steel wool in a jar of white vinegar for 24 to 48 hours.
- Brush the solution onto raw wood surfaces.
- The acid reacts with the wood’s natural tannins, oxidizing the timber within minutes into an authentic weathered gray-brown finish.
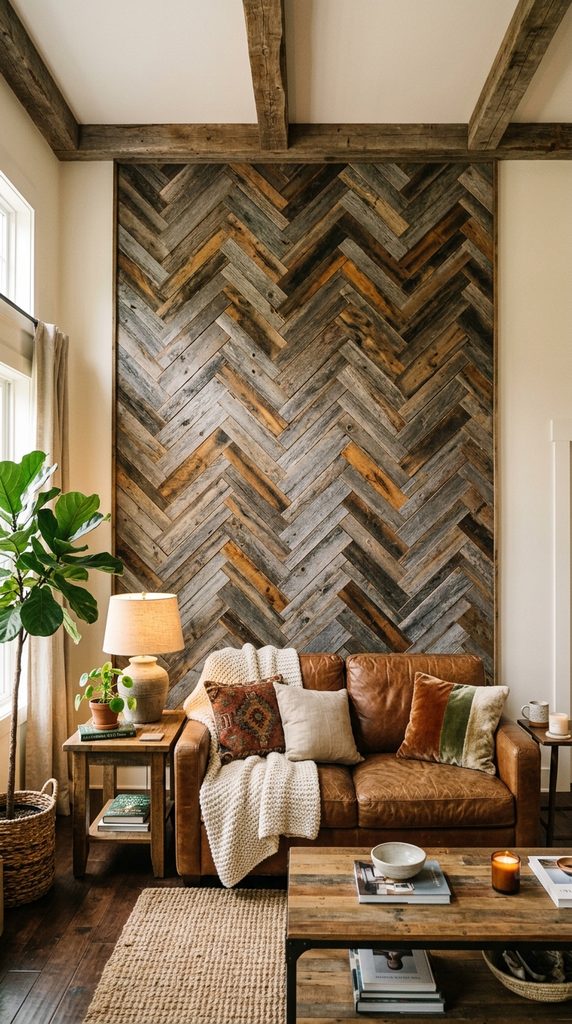
1. The Reclaimed Barn Wood Herringbone Wall Panel
A large herringbone-patterned timber panel combines geometric precision with raw, weathered wood textures, serving as a striking architectural focal point.
Material Specifications & Step-by-Step Execution
- Materials Needed: $1/2\text{-inch}$ plywood backing sheet ($36\times48\text{ inches}$), reclaimed barn wood slats cut to equal lengths, construction adhesive, brad nailer, dark walnut wood stain.
- Execution Strategy: Mark a vertical center guideline down the plywood backing sheet. Cut barn wood slats at precise $45\text{-degree}$ angles. Starting from the center guideline, lay the slats in an interlocking herringbone pattern, securing each piece with construction adhesive and brad nails. Frame the outer perimeter with dark-stained square timber trim.
- Best Spatial Placement: Anchor piece above a living room sofa, fireplace mantle, or dining room sideboard.
Design Tip: Alternate between light, medium, and dark weathered wood slats to enhance visual depth and highlight the herringbone geometric pattern.
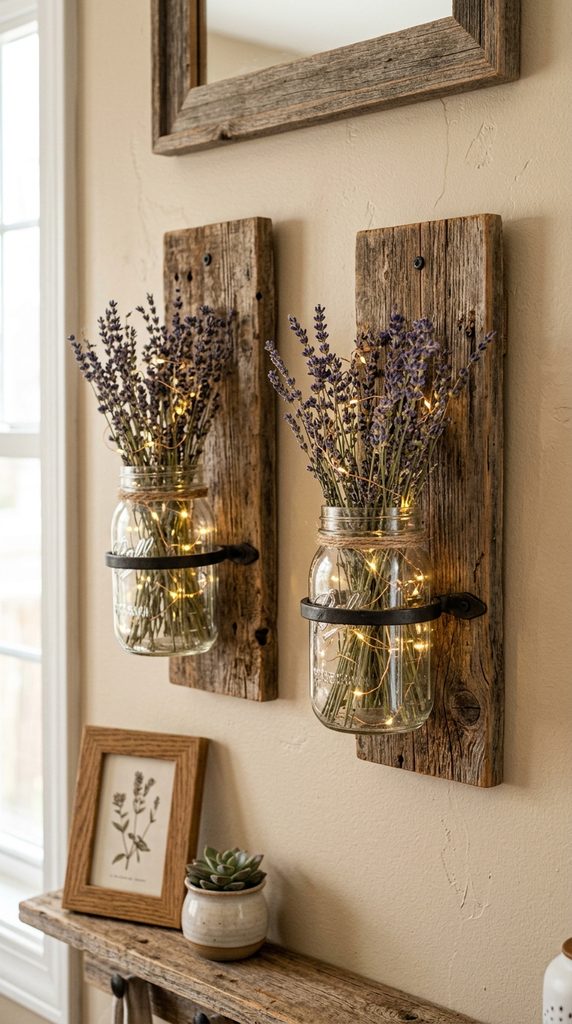
2. The Mason Jar & Weathered Sconce Flower Wall
Combining raw timber, black iron hardware, and clear glass jars, these hanging sconces showcase fresh wildflowers or warm LED fairy lights.
Material Specifications & Step-by-Step Execution
- Materials Needed: Two weathered cedar boards ($6\times18\text{ inches}$), heavy-duty black iron hose clamps, 32 oz glass mason jars, wrought iron mounting hooks, battery-operated warm fairy lights or dried lavender sprigs.
- Execution Strategy: Sand cedar boards lightly to smooth splinters while preserving the rough-sawn surface. Stain boards with an espresso wood finish. Screw a black iron hose clamp into the center of each board and tighten it securely around the neck of a glass jar. Mount a wrought iron hook at the top for wall hanging.
- Best Spatial Placement: Flanking a living room wall mirror, entry hallway, or bedroom headboard.
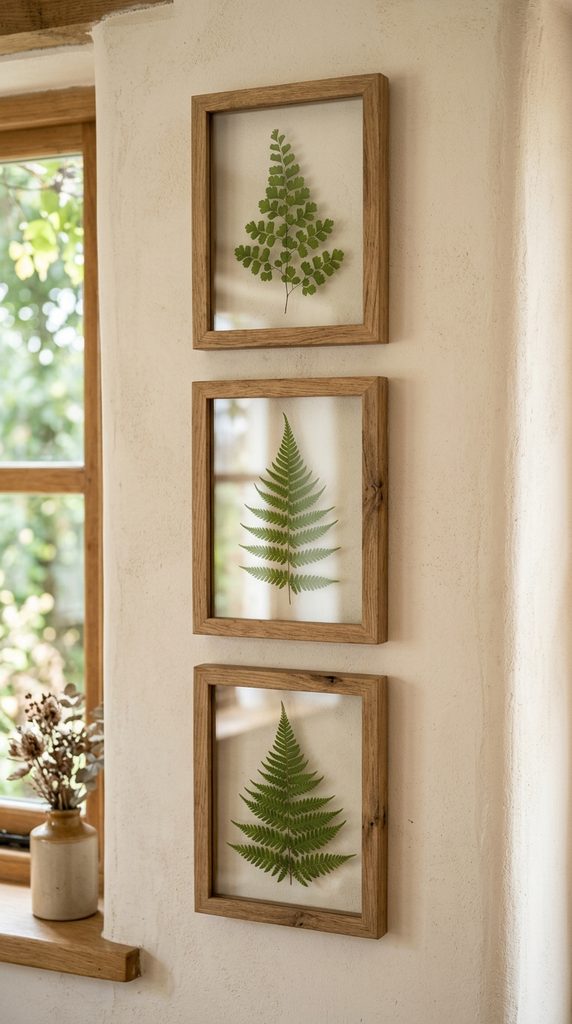
3. The Botanical Pressed Leaf Floating Glass Frames
Enclosing dried botanical leaves, fern fronds, or wildflowers between double glass panes within raw wooden frames creates a delicate, nature-inspired display.
Material Specifications & Step-by-Step Execution
- Materials Needed: Double-glass floating picture frames with raw oak or pine borders, pressed botanical leaves (ferns, eucalyptus, oak leaves), parchment paper, heavy books.
- Execution Strategy: Press fresh leaves between sheets of parchment paper inside heavy books for 7 to 10 days until completely dry. Position the pressed leaves carefully on the bottom glass sheet of the frame. Lay the top glass pane over the leaves and seal the frame, allowing the wall color behind to show through the transparent glass surround.
- Best Spatial Placement: Arranged in a vertical trio along a hallway, reading nook, or bathroom wall.
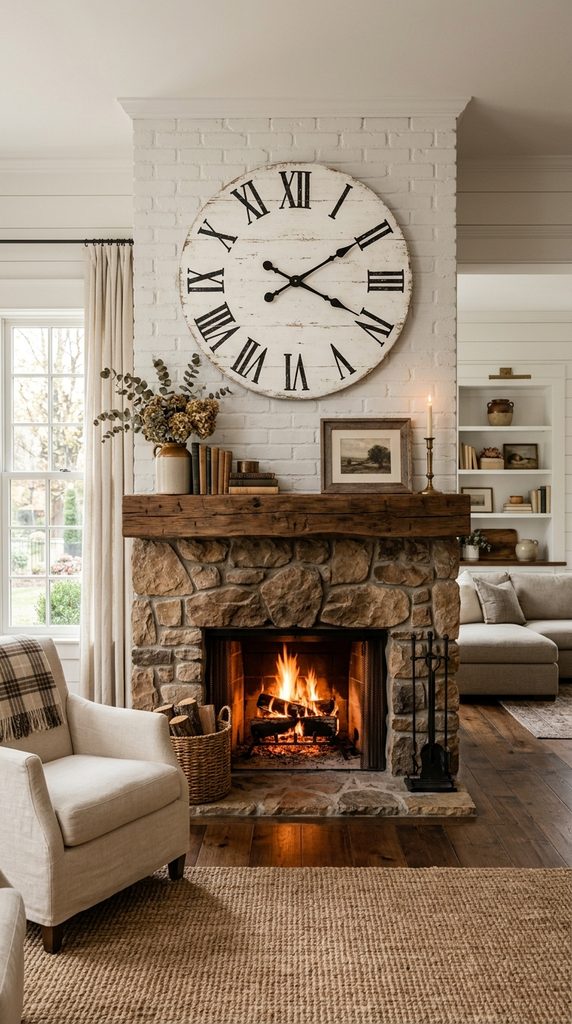
4. The Oversized Rustic Wooden Farmhouse Clock
A large wooden clock with distressed Roman numerals delivers functional charm while making a bold statement on open wall surfaces.
Material Specifications & Step-by-Step Execution
- Materials Needed: $30\text{-inch}$ circular plywood or edge-glued pine round, black spade clock hands with high-torque motor mechanism, black acrylic paint, white chalk paint, sandpaper.
- Execution Strategy: Paint the wooden disc with a base layer of dark espresso acrylic paint. Once dry, apply two coats of white chalk paint over the top. Once cured, sand the edges, surface center, and grain lines lightly to reveal the dark base layer underneath for a distressed finish. Stencil or hand-paint black Roman numerals around the perimeter, then install the central clock mechanism.
- Best Spatial Placement: High focal wall in a open-concept living space, dining room, or kitchen nook.
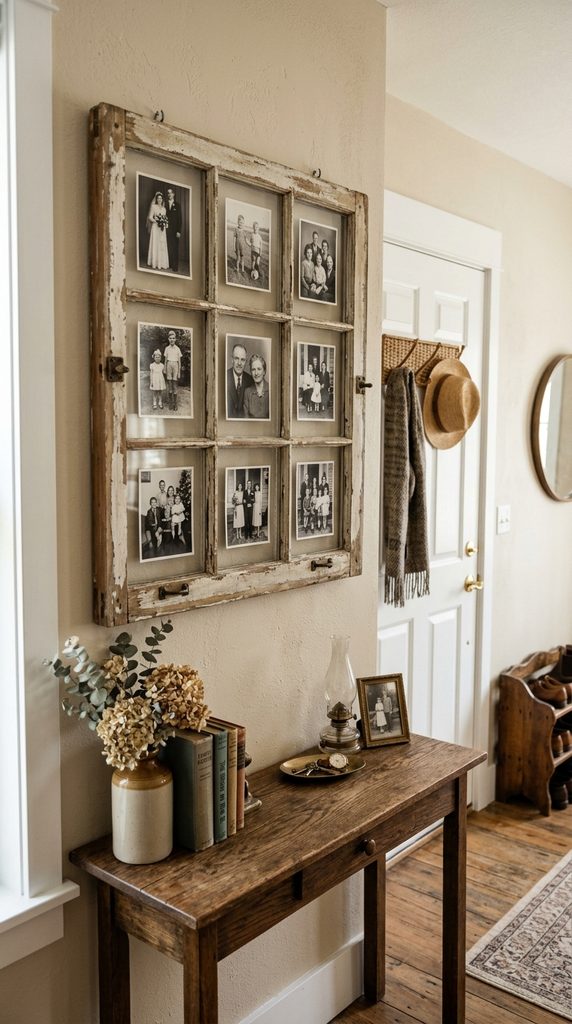
5. The Repurposed Antique Window Frame Photo Display
Upcycling salvaged multi-pane wooden window frames transforms architectural history into a sentimental family photo display.
Material Specifications & Step-by-Step Execution
- Materials Needed: Antique 4-pane or 6-pane wooden window frame, printed black-and-white family photographs, clear double-sided tape, natural jute twine, mini wooden clothespins.
- Execution Strategy: Clean the window frame gently, preserving chipping paint by applying a coat of clear matte sealant. Print black-and-white photos sized to fit each window pane section. Secure photos directly behind the glass using clear double-sided tape, or stretch rows of jute twine across empty window openings and clip photos using mini clothespins.
- Best Spatial Placement: Main entryway gallery wall, staircase landing, or cozy family room.
6. The Birch Branch & Woven Macramé Wall Hanging
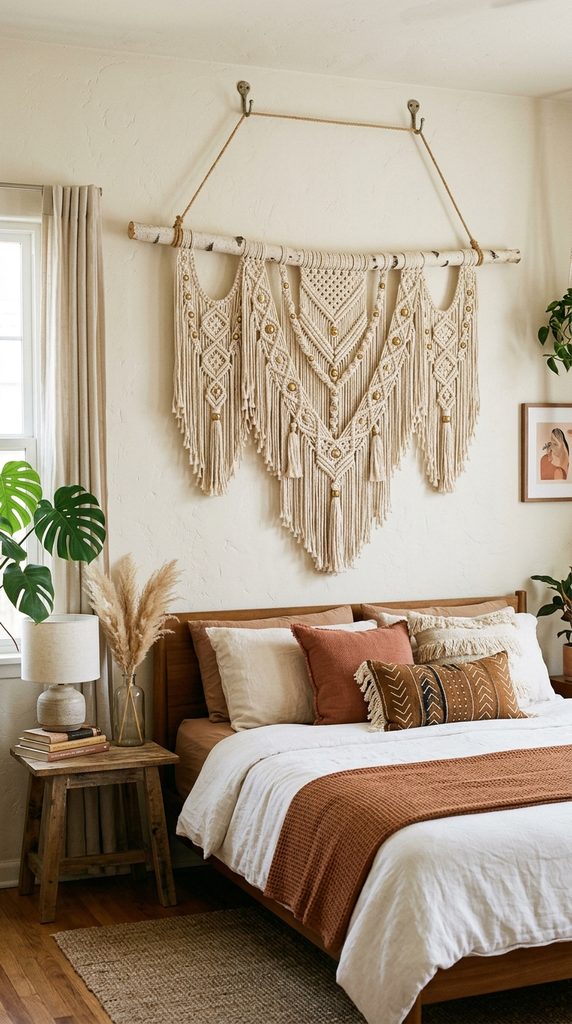
Combining raw birch tree branches with cotton macramé cord weaves organic outdoor textures directly into modern interior spaces.
Material Specifications & Step-by-Step Execution
- Materials Needed: Cleaned birch branch ($36\text{ inches long}, 1.5\text{ inches thick}$), $4\text{mm}$ natural cotton macramé cord, brass or copper accent beads.
- Execution Strategy: Secure the birch branch horizontally on a table. Cut multiple lengths of cotton macramé cord and attach them across the branch using lark’s head knots. Weave square knots and diagonal half-hitch knots into a central V-shaped geometric tapestry pattern. Thread brass beads onto select fringe strands, then trim the bottom fringe into a clean chevron angle.
- Best Spatial Placement: Hanging behind a master bedroom bed, guest room, or above a cozy reading armchair.
7. The Distressed Timber Floating Ladder Shelf
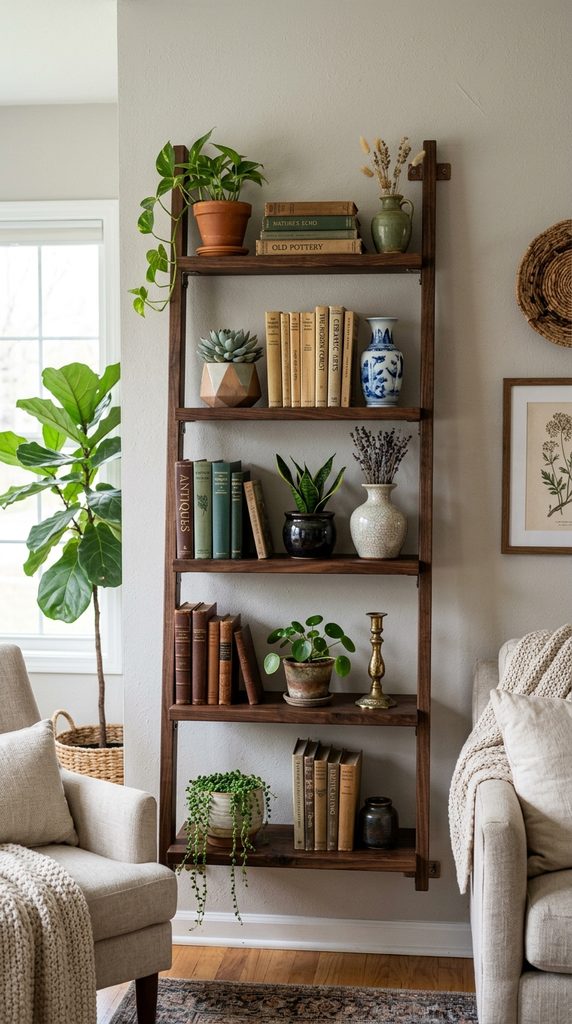
A wall-mounted rustic ladder shelf offers vertical storage display layers for books, trailing indoor vines, and small antique collectibles.
Material Specifications & Step-by-Step Execution
- Materials Needed: Two 2×4 pine studs ($48\text{ inches}$ long), three 1×6 shelf boards ($18\text{ inches}$ long), wood screws, dark walnut wood stain, wire brush, heavy-duty L-brackets.
- Execution Strategy: Distress timber using a wire brush to open the wood grain. Stain all boards with a rich dark walnut wood finish. Space the three shelf rungs evenly between the vertical side rails, securing them with counter-sunk wood screws. Mount the assembled ladder flat against the wall using concealed L-brackets anchored into wall studs.
- Best Spatial Placement: Kitchen wall for spice jars, bathroom wall for folded towels, or living room display wall.
8. The Woven Tobacco Basket & Wreath Layered Set
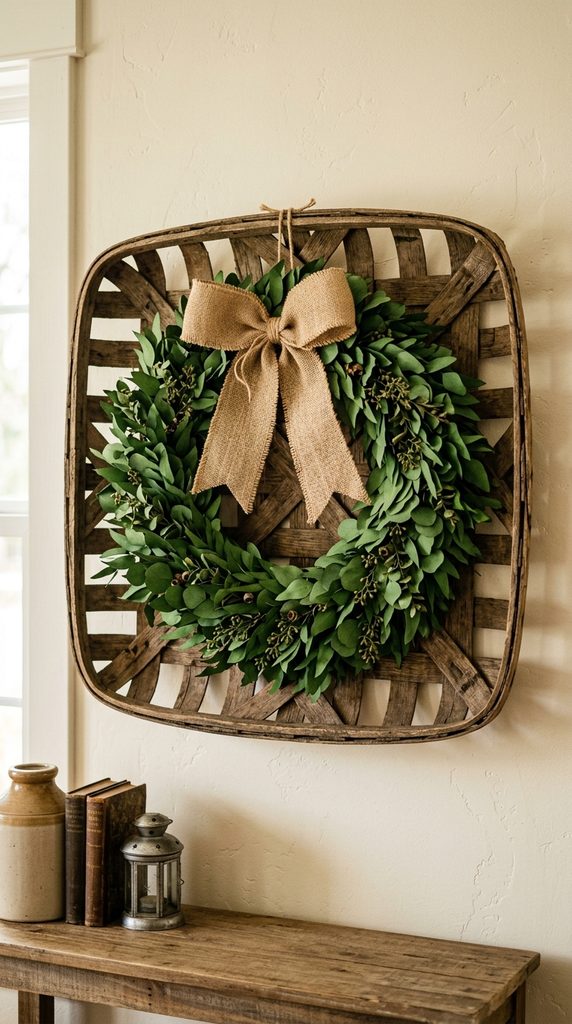
Layering small green boxwood or eucalyptus wreaths over traditional flat woven wooden tobacco baskets adds rich texture and depth to flat walls.
Material Specifications & Step-by-Step Execution
- Materials Needed: Woven wood-strip tobacco basket ($24\times24\text{ inches}$), $16\text{-inch}$ faux boxwood or preserved eucalyptus wreath, burlap ribbon, florists wire.
- Execution Strategy: Mount the square or rectangular woven tobacco basket directly flat against the wall. Secure the round greenery wreath to the center of the basket using thin floral wire passed through the wooden weaving gaps. Tie a large loop bow out of raw burlap ribbon and attach it to the top of the wreath frame.
- Best Spatial Placement: Centered above an entryway console table, fireplace mantel, or dining nook bench.
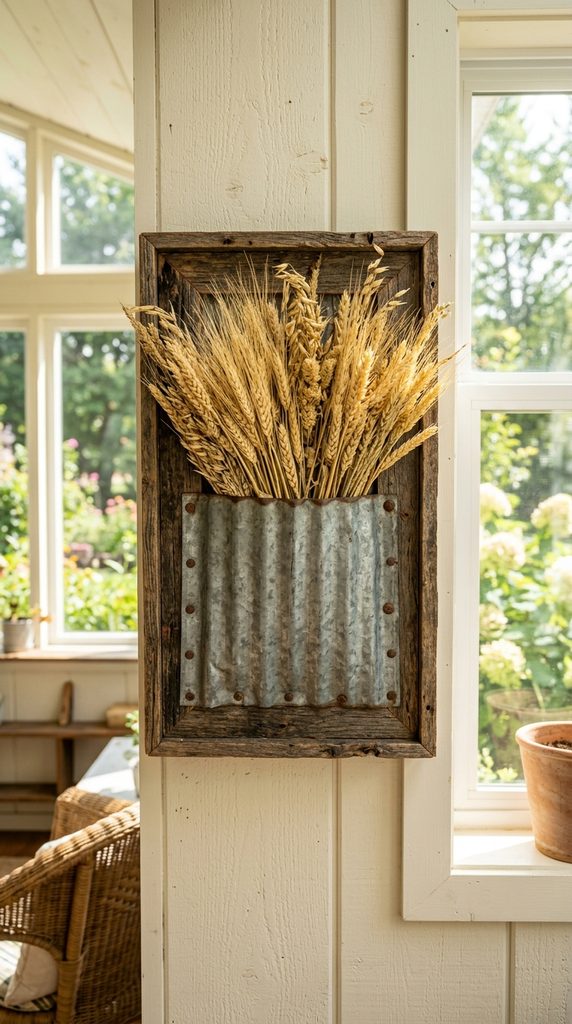
9. The Galvanized Metal & Barn Wood Pocket Planters
Pairing corrugated galvanized metal sheets with rustic wood frames yields durable wall pockets perfect for indoor greenery, succulents, or dried wheat stalks.
Material Specifications & Step-by-Step Execution
- Materials Needed: Reclaimed wood frame box ($10\times14\text{ inches}$), corrugated galvanized metal sheet cut to a pouch shape, heavy-duty tin snips, upholstery tacks, dried pampa grass or faux succulents.
- Execution Strategy: Build a simple shallow three-sided wooden box frame out of reclaimed timber. Cut the corrugated metal sheet with tin snips to form a front pocket cover. Fasten the metal sheet to the bottom and sides of the wooden frame using antique bronze upholstery tacks driven with a mallet. Fill the pocket with dried pampa grass, cotton stalks, or faux greenery.
- Best Spatial Placement: Covered patio walls, sunrooms, kitchen walls, or entry alcoves.
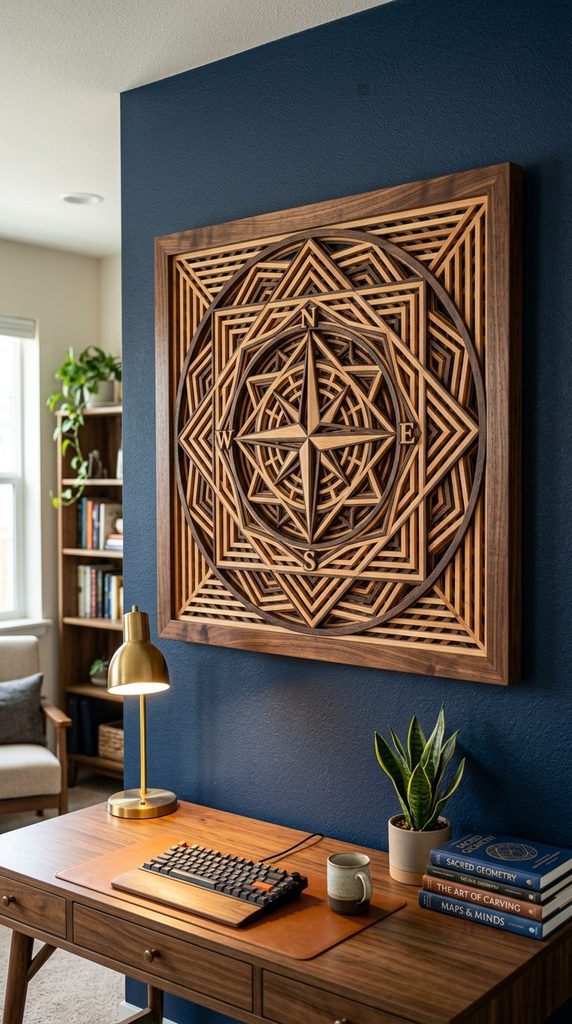
10. The Geometric Wood Slat & Compass Wall Carving
Using varied timber thicknesses and precise wood cutting techniques, this geometric wall carving features an intricate compass rosette mounted within a dark framed square.
Material Specifications & Step-by-Step Execution
- Materials Needed: $24\times24\text{-inch}$ plywood backing panel, thin cedar lattice slats, scroll saw or miter saw, wood glue, natural cedar oil finish, black frame trim.
- Execution Strategy: Draw an eight-point compass rosette pattern onto the backing board. Cut cedar lattice slats into small triangular and diamond shapes according to the pattern layout. Glue each cut piece onto the board, alternating wood grain directions between points to capture light variations naturally. Frame with dark-stained timber and seal with clear cedar oil.
- Best Spatial Placement: Study wall, home office desk background, or formal living space focal wall.